
Procreate 5: Updates for Hand Lettering and Calligraphy
"Procreate 5 is the biggest and most adventurous update yet. With a host of powerful new features and improvements, this major free update is the Procreate you know and love, only better in every way." - Procreate
Procreate 5 was released in December 2019 and to access the update, you'll need to have the latest iOS installed on your iPad.
A LOT changed, so we're highlighting the top updates that are most relevant to hand lettering and calligraphy on the iPad.
Pin it for later! ↓

Watch the video below, or scroll down to read more about each update.
Wondering which iPads work with Procreate? Read our iPad comparison and compatibility article here.
Table of Contents
Subscribe to our YouTube channel and never miss a video!
Procreate 5: What's New?
The majority of the new and improved features are in the colors and brushes. The updates allow for easier, more efficient workflows. There are also new features that allow you to create more advanced artwork. Read about them below.
NEW FEATURE: Detachable Color Companion
In the past, the color menu closed when you returned to the canvas, meaning that you had an extra tap each time you wanted to access a new color. With Procreate 5, the color panel pops out for easy access. Simply tap the color wheel to open the menu, then tap and hold on the bar at the top and drag it anywhere on screen to detach it. Tap the ‘x’ to close the pop-out menu.
NEW FEATURE: Color Harmony Tool
This tool can be found within the color panel, between Classic and Values. You select a color and it automatically shows you the harmonious colors based on your selection. For example, for a Complementary scheme, the tool will show you the complement of your selection (i.e. the opposite side of the color wheel). Profile options include: Complimentary, Split Complimentary, Analogous, Triadic and Tetradic.


NEW FEATURE: Color History of 10 Recent Colors
Note: this feature is currently only supported on iPad pro models with larger screens. On the Disc menu above the color palette, you’ll see a history of your ten most recently used colors.

You may also like: How To Make A GIF In Procreate
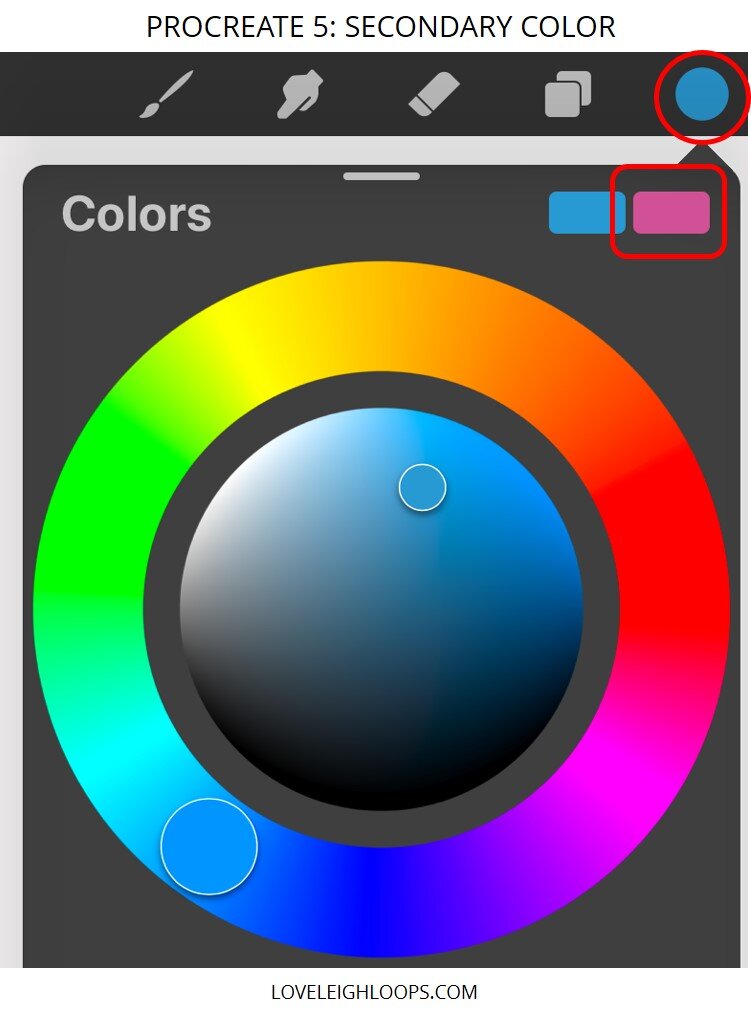
NEW FEATURE: Secondary Color
Before, the color shown to the right of your color in the Disc menu was the previous color. Now, this is the secondary color. Certain brushes allow you to use two colors. Tap and hold on either the primary or the secondary color to recall its previous color (giving you easy access to four colors).
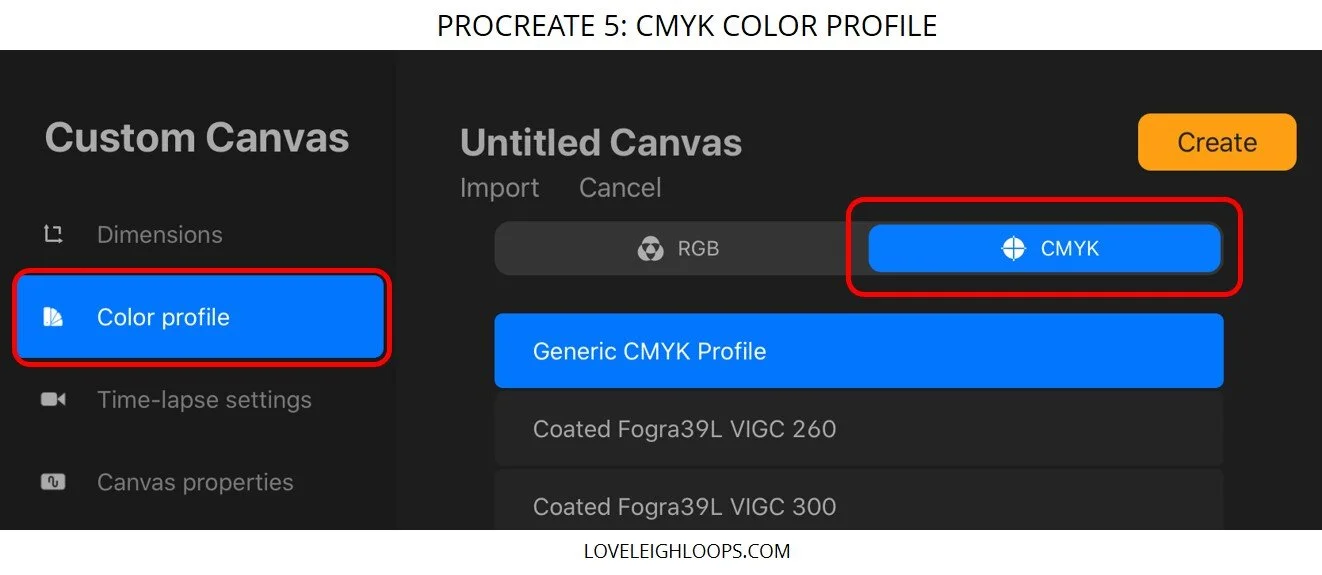
NEW: CMYK Color Profile
When creating a new canvas, change the Color Profile setting to CMYK if you intend to print your work. The colors will appear slightly duller than in RGB but will more closely match the printed work.
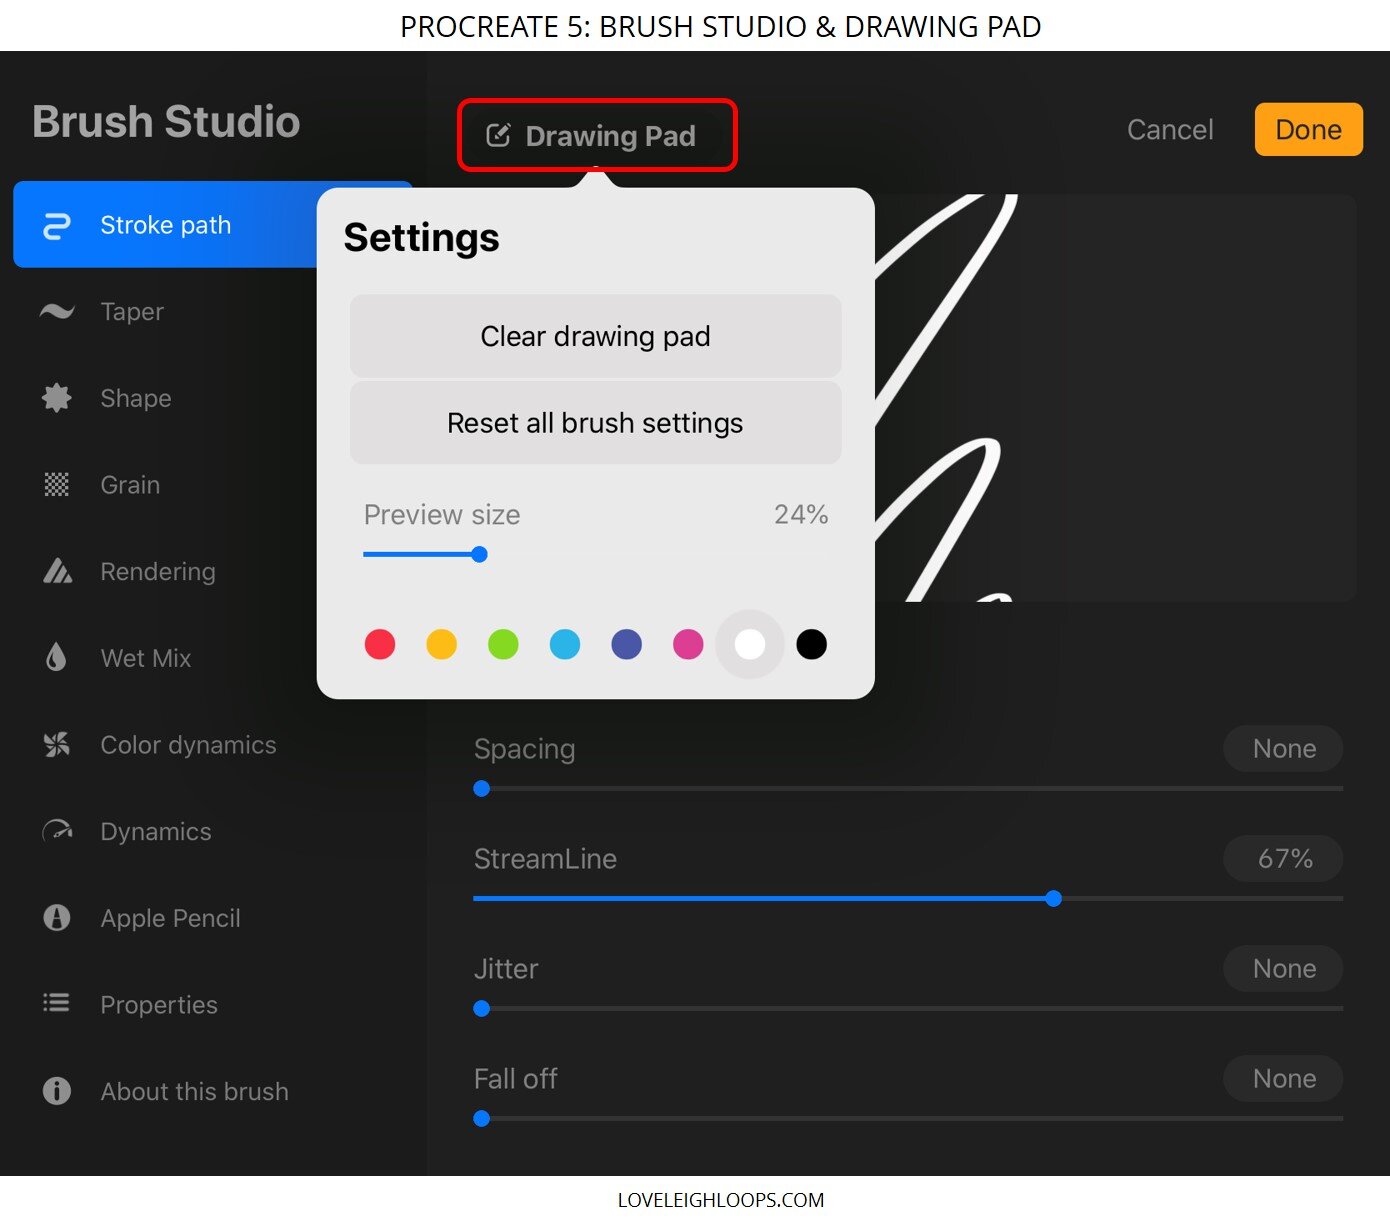
IMPROVEMENT: Brush Studio Redesign
Before, you could edit brushes and test them in a small pop-out menu. Now, the brush studio is full-screen and includes a larger drawing pad with different color options. Access the studio by tapping on a brush that’s open in your Brush Library. In the studio, there are other new settings, such as seamless patterns, stamp count, and color dynamics (see next feature), plus improvements to existing settings.
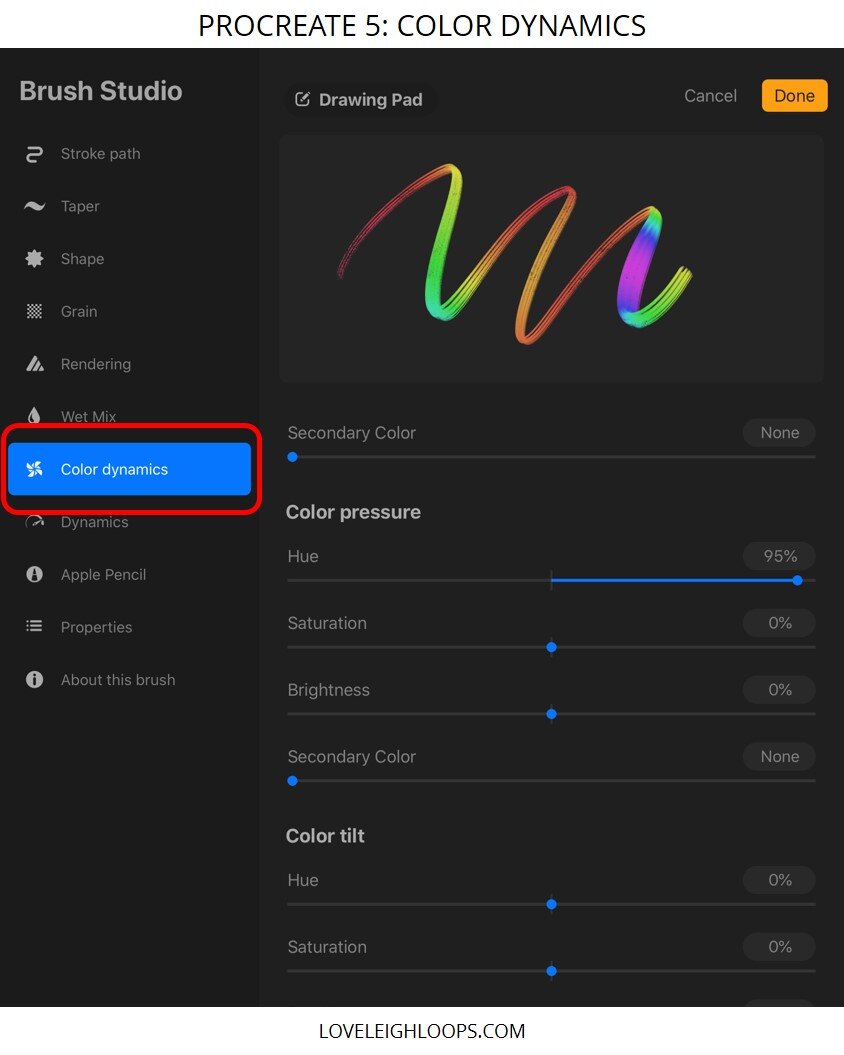
NEW: Color Dynamics
Within the brush studio, Color Dynamics is a new setting with multiple options. This allows the strokes to change in hue, saturation and brightness based on variables like pressure, tilt, or even randomly (jitter). Color Pressure is most closely related to the majority of the calligraphy brushes, but the best way to figure out the settings it to experiment and see the changes in real-time.
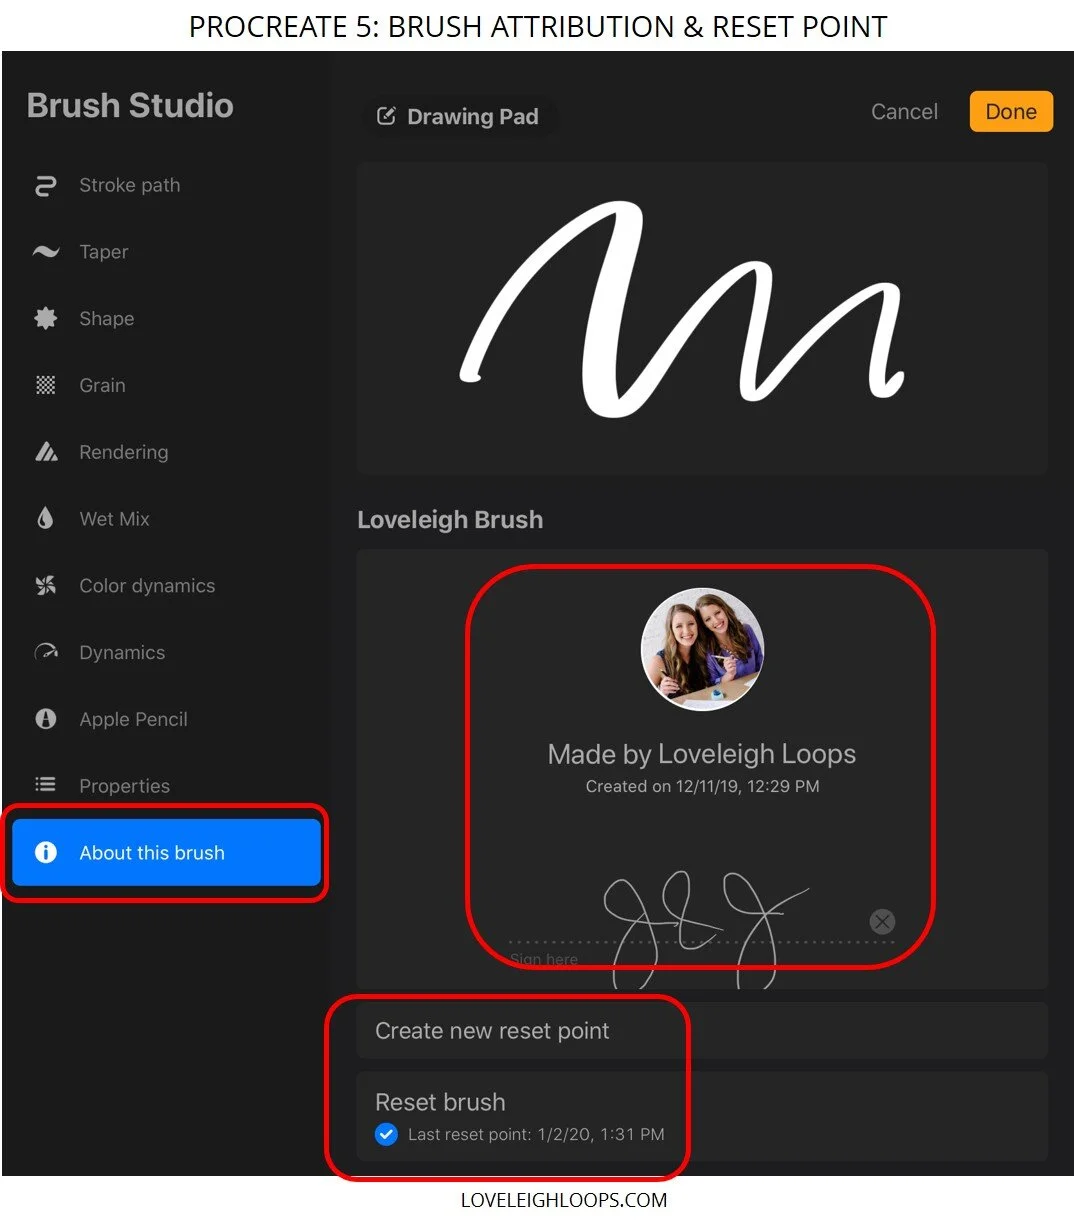
NEW: Brush Attribution and Reset Point
In the About This Brush section of the brush studio, artists can now upload a profile picture and create a signature. A brush reset point can be created, which allows for a permanent version to return to. Then, if you make changes to a custom brush, you can reset it to that point. In the past, resetting a custom brush would mean starting from scratch.
NEW: Brushes
With the update, Procreate added more default brushes. They can all be found at the top of each set. Bonus: they updated some of the existing brushes to add color dynamics, such as Glimmer under Luminance. If you have the time, we recommend going through every single set in the Brush Library and drawing a stroke or two with each--you may find a new favorite!
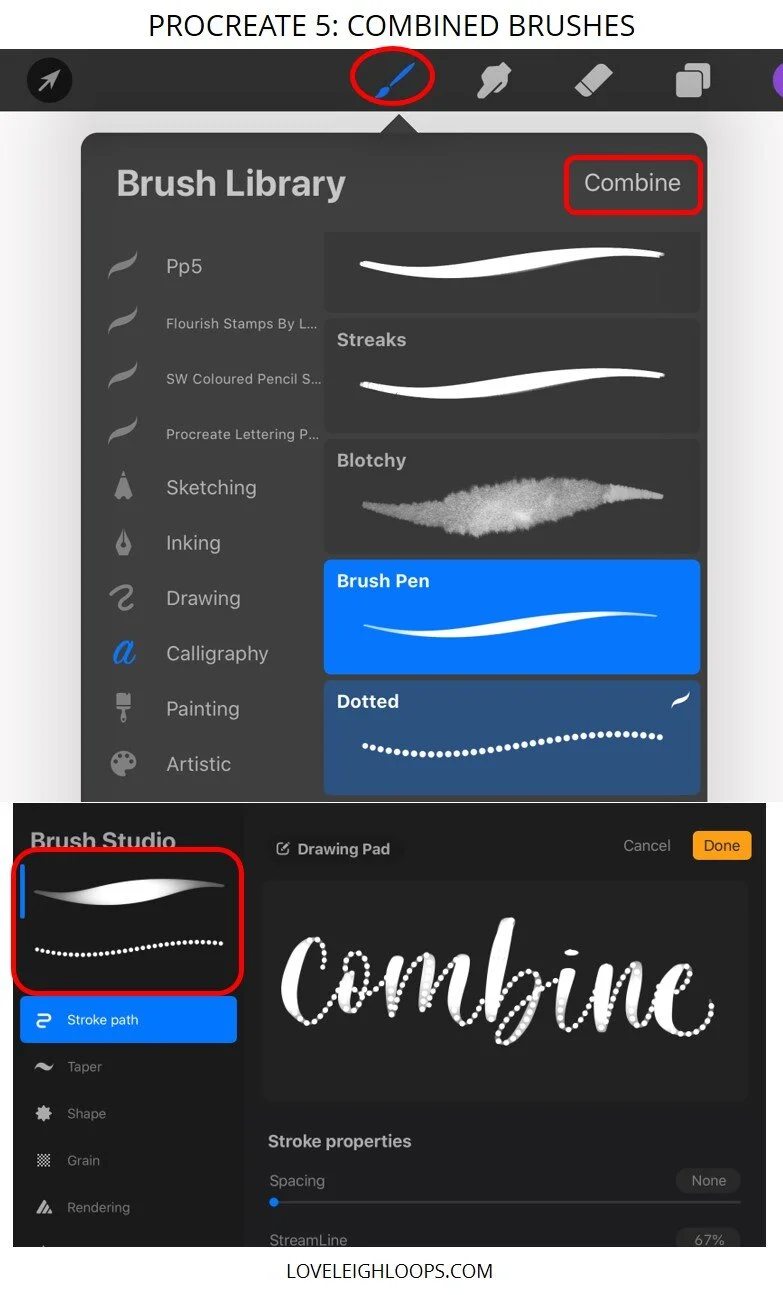
NEW: Combined Brushes
Two separate brushes can be combined into one. To do so, tap on the primary brush. Then, choose the secondary brush by swiping it to the right. (Note: They must be in the same set to be combined.) When both are selected, choose Combine (top right of menu). To uncombine a brush, tap into the brush studio, then tap the secondary brush twice and select Uncombine. Pro tip: Duplicate both of the brushes before combining them so that you can still use them independently.
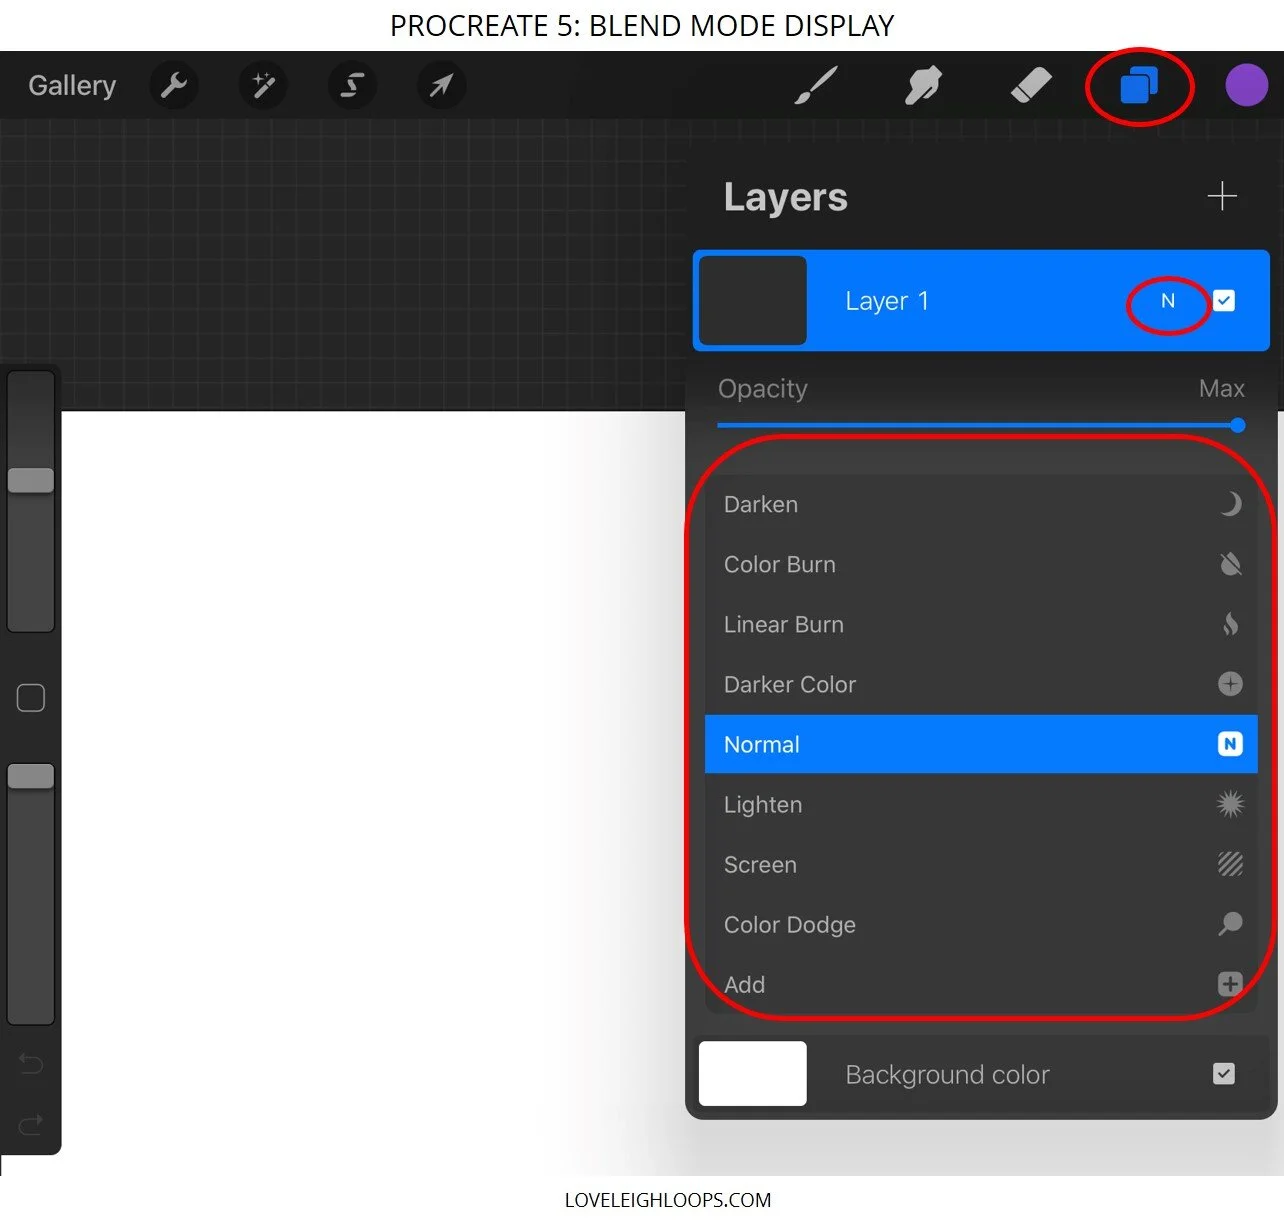
IMPROVEMENT: Blend Mode Display
To access blend modes, open the Layers Menu and tap on the ‘N’ next to the checkbox. This will open the blend mode list, which you can scroll through to update in real time. Previously, the modes were separated into multiple categories instead of a single list, which made them easier to find but more time consuming to explore.

NEW: Clone Tool
Find the clone tool in the Adjustments. A circle will appear on the screen: move the circle to the area that you’d like to clone, then draw anywhere on the canvas and it will replicate the area. You can adjust the brush size and strength in the bottom menu. Note: The clone tool only samples from the current layer.


Want to learn our top 18 Shortcuts for Procreate? Download the list now!
