
How To Practice Calligraphy Effectively (+ Free Worksheets!)
The most impactful thing you can do for your calligraphy journey is to fall in love with practicing.
Calligraphy practice will be a part of your life from day 1 when you're trying your hand at faux calligraphy or pencil calligraphy for the first time, all the way up day 1,000 when you're a masterful calligrapher or running your own calligraphy business.
"Practice" can feel like a vague term, but that ends today. In this guide, we're going to show you:
How to practice most effectively
Tips to make practicing easier
Real-life practice results
These tips will help you practice any style: modern calligraphy, hand lettering, traditional calligraphy or any style in between. Let's dive in!
↓ Pin it for later! ↓

Table of Contents
The Benefits Of Regular Practice
Like any skill, calligraphy is learned in increments rather than a single sprint.
Your rule of thumb: 15 minutes of practice a day is better than 5 straight hours once a month.
We've taught thousands of students calligraphy all over the world, and we've seen this mindset move mountains. Regular practice achieves two very important goals: continuous improvement and muscle memory.

Feel Yourself Continuously Improve
Once you start taking your calligraphy practice seriously, you'll see that one of the big benefits of regular practice is that it goes hand in hand with steady improvement.
You may not see a noticeable change overnight, but your writing will look different after a week or two.
When you take time to practice regularly, you'll improve regularly. This happens because you're building muscle memory.

Build Muscle Memory
When you first learn calligraphy, certain hand movements require a lot of effort. Calligraphy basics like using a pointed pen or even drawing even thick or thin strokes require focus and repetition — this is completely normal!
Through repetition and practice, you can slowly but steadily eliminate this need to concentrate on the fundamentals. After a while, you'll see that you're able to replace conscious thought with muscle memory.
Building muscle memory is a very slow process — only by putting in time and effort can you train the muscles in your hand. But the upside: with practice, you will see improvement.

What To Practice?
A quick practice session... sounds so easy, but what does that look like? Do you just write the alphabet over and over?
We suggest following these steps in your calligraphy practice:
Basic calligraphy strokes
Basic letter forms
Capital letters
Letter variations
New lettering styles
Let's zoom in and examine each one! We have free worksheets for you, too.

Basic Calligraphy Strokes
When it comes to calligraphy practice, we can't stress this enough: the more you master the basics, the more your advanced work will look. This means starting with the calligraphy basic strokes.
The basic strokes are the small building blocks that make up the lowercase alphabet. All new calligraphers need to learn two elements:
How to write the basic calligraphy strokes
How to get contrast between thick and thin lines within strokes
Practice the basic strokes with our free guide sheet below and our basic strokes tutorial.

Don’t have calligraphy pens yet? Learn faux calligraphy instead with our free faux calligraphy course.
Basic Letter Forms
After the basic strokes come your basic letter forms. In calligraphy, the lowercase alphabet is different than normal cursive writing. You'll use the basic strokes to build each letter piece by piece, which is how you get that beautiful consistency.
While it may feel elementary to revisit that lowercase alphabet, this step is pivotal in your calligraphy journey. Try to find the joy and relaxation in the repetition!
Learning and practicing your basic letter forms is important for all calligraphy styles, and will be the foundation of advanced techniques like flourishing or bounce lettering.

Uppercase Alphabet
After the lowercase alphabet comes the uppercase alphabet. Capital letters are built differently from the lowercase letters.
Capital letters use different fundamental strokes. Below, we have a free worksheet that teaches you two modern styles for capital letters. If you're interested in learning the traditional scripts, you can use our Copperplate capital letters guide for a deep dive as well as tips on how to practice!

Letter Variations
Traditional calligraphy focuses on rules and structure - and we love it. But there's also a joy in breaking the mold and creating your own letter variations.
As long as your words remain legible, a modern calligrapher can create endless letter variations. You'll find that knowing even a few variations can make a difference and give your calligraphy a more advanced look.
One of our techniques for creating letter variations is our "Letter Logic" technique. We teach this in an in-depth course, plus we share part of the course workbook for free so everyone can try:

Different Lettering Styles
From traditional Copperplate calligraphy to playful brush lettering, we encourage students to try all of the different types of calligraphy that call to them.
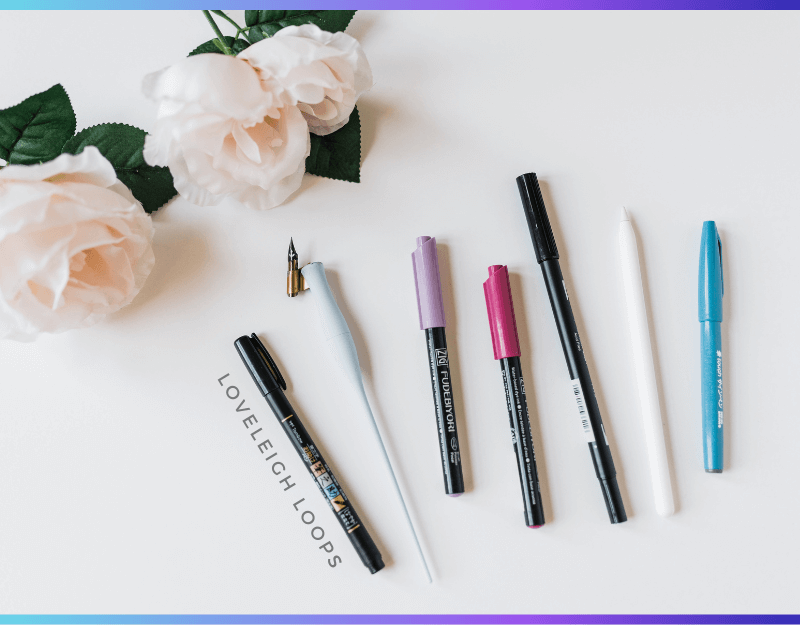
This may mean trying different writing tools:
Pointed pen = Copperplate and Spencerian
Brush pens = brush pen lettering and bounce lettering
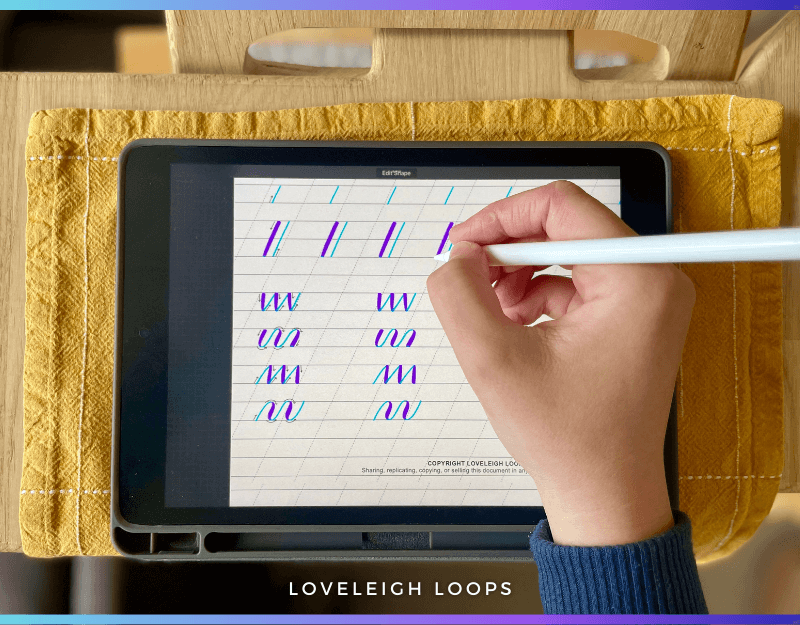
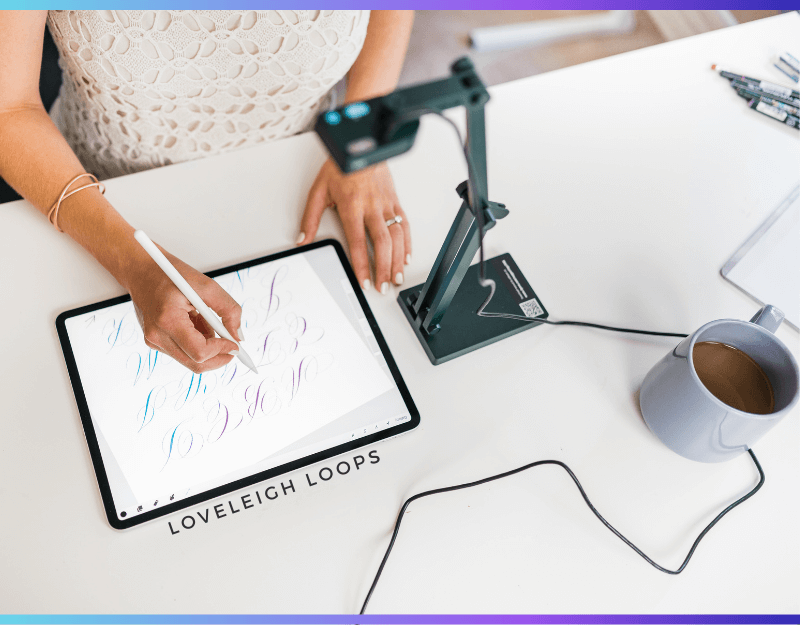
Apple Pencil = iPad lettering and digital flourishing
This is just an overview; these can also be mixed and matched, such as writing modern calligraphy with a pointed pen.
Beyond being creative and fun, learning different styles of calligraphy also means you'll be able to use your lettering for different things. For example, colorful bounce lettering works well for a birthday card but you may want to use something a little more formal for a wedding invitation.
Use our free practice worksheets to explore different styles! In our free worksheet library, you'll find free practice sheets for tons of different calligraphy styles. We have dozens of resources to choose from, whether you're looking for modern calligraphy worksheets or for free calligraphy practice sheets for traditional scripts.
Simply print any calligraphy practice sheet at home (on the right paper) and start writing.

What To Look For When You Practice
When you're looking at a pile of paper covered in exercises and drills, you'll probably wonder: how can you tell if you've gotten any better?
All calligraphers know that making progress with calligraphy is a slow burn. Self-critique is an important part of improving your calligraphy skills so let's take a moment to look at what progress looks like.

Jillian practicing with brush pens
Proper Letter Forms
A very obvious and easily measurable form of progress is your letters themselves.
Your first step is to learn the shapes of the letters (as we discussed above). But after learning the basic forms, it can be tricky to look for things to critique.
When you look at your letters, ask yourself questions like:
Are the basic strokes written properly?
Do your stem loops follow the slant line on your worksheet?
Does each of the letters fit between the guidelines on your calligraphy worksheet?
By looking at each individual letter you can get a clear idea of where you stand in your knowledge of their shapes.
Get an a-to-z critique of the lowercase letters in our guide:

Let's zoom in a little and look a some finer details.
Smooth Transitions
Creating smooth transitions between your thick and thin lines is one of the hardest things to learn for beginning calligraphers.
Looking at you own work, are your transitions smooth enough? Focus in on these details:
Do your ovals taper before hitting the baseline?
Do your underturns and compound curves look smooth?
Are the tops and bottoms of stem loops to your liking?
Going seamlessly between thin upstrokes and thick downstrokes is an important part of making your calligraphy look the part and it's worth spending time on this!

Even the fundamentals are beautiful in calligraphy
Consistent Letters
When you critique your own work, pay special attention to consistency. Getting your letters nice and even makes an enormous difference in how polished your writing looks.
Keep in mind that consistency is more than making sure your letters are of equal size. Consistency also means that your:
Letters are written at an equal slant
Thick strokes are equally thick
Thin strokes are equally thin
Any loops are of identical roundness
Shading occurs in the same spot for identical letters
Getting to the point where you can consistently produce writing that is balanced and even will take time but we know it's possible and we're rooting for you!

Consistent Spacing
One often overlooked element of callirgaphy deserves its own special mention here: spacing. Uniform spacing between letters is one of the final steps that will take you from a beginner calligrapher to an intermedia calligrapher.
Like all elements of good calligraphy, the space needs to be the uniform throughout the word. Guidesheets and practice will help you master this.
Easy tip: Turn your paper upside down or hold it up to a mirror so you can focus on whitespace/consistency from a different angle. This can help make inconsistencies more noticeable.

Jordan practicing traditional calligraphy
Calligraphy Practice Tips
We know it's hard to chisel out time in your life for a hobby. There's always dinner to plan, something to clean or something essential vying for your attention.
When you do find the time to practice, it's important to make it count. So let's go over some ways to get the most out of your practice time!
Start With Warm-Ups
When you sit down to practice calligraphy, it's always a good idea to include a few simple drills before you move on to the thing you want to work on. We practice what we preach - even after 10+ years, we still start with drills when we practice!
Start with warm-ups/basic drills or basic strokes like you see here:
Always Use Calligraphy Practice Sheets
Regardless of whether you want to learn modern calligraphy or traditional calligraphy, it's essential to always use calligraphy practice sheets when you sit down to practice.
Not only does a calligraphy worksheet help with getting the hang of new calligraphy pens, it lets you work on the most important quality of all: consistency.
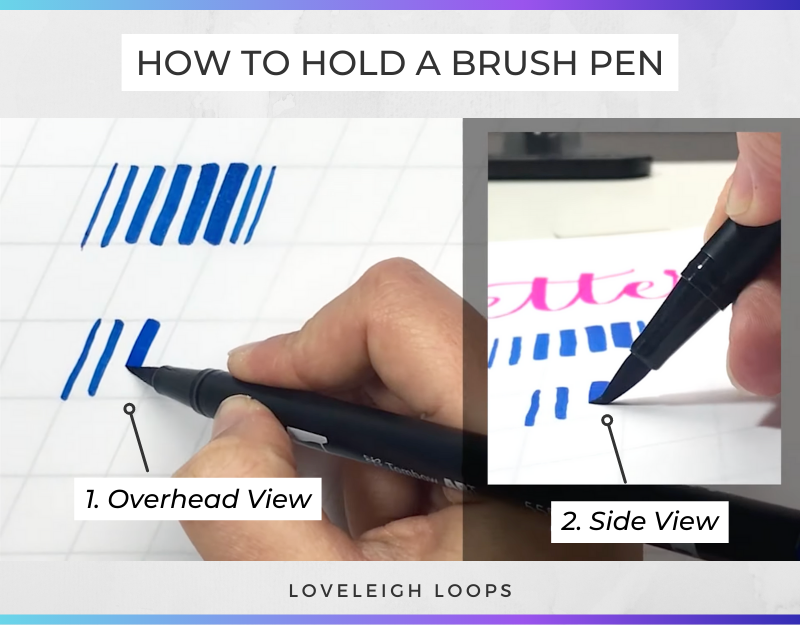
Use Your Calligraphy Pen Correctly
One of the things that makes calligraphy look the way it does is the contrast between thick and thin strokes. Calligraphy pens such as a brush pen or pointed pen let you do this through pen pressure, but holding your utensil the wrong way will make this difficult or impossible.
This is why it's so important to use proper technique as you practice. If you're a complete beginner, learning how to use a calligraphy pen up front will prevent frustration down the road.
Small things like pen angle and direction make a huge difference. Here's how to use your pen correctly:
Hold your pen at a 45-degree angle
Angle your wrist so that your pen points to the side of the page.
This way you can use your pens to create thick and thin lines without damaging them.
How LONG Should You Practice?
While there's no such thing as practicing calligraphy too much, there is such a thing as practicing too little.
Like working on any other skill, you need to give yourself a little time to warm up and get your hand muscles going at the start of every session. This is especially true if you haven't practiced for a few days!
We said at the beginning that 15 minutes of practice a day is better than 5 straight hours once a month.
But if you have the time for it, we recommend allocating at least 30 minutes of dedicated practice time for your session to truly make a difference.
Honestly the hardest part is getting out a pen and sitting down to practice. Once you get started, you may find that the 30 minutes flies by in no time.
How OFTEN Should You Practice?
Practicing calligraphy is very much a matter of quantity over quality. While your calligraphy skills will certainly improve with daily practice, skipping a day here or there isn't a deal breaker.
As long as you find the time for a proper practice session, you can progress by practicing 3-4 times per week.
↓ Pin it for later! ↓

How To Practice Calligraphy Composition?
One of the hardest things to practice is the art of calligraphy composition. This is a task for more expeirenced lettering artists, but it's never too soon to get ideas and inspiration.
Here are some quick tips:
Sketch your layout out with a pencil before you spend time using a calligraphy pen
Analyze lettering projects/work from other hand lettering artists for ideas (but not copying!)
Go back and improve your past compositions
Learn more in our deep-dive composition guide (or our course):

Tips For Daily Practice
We know how hard it can be hard to find the time to practice. Between the two of us, we're juggling Loveleigh Loops and our 5 "interns" (our 5 combined daughters, soon to be 6!).
Remember this: you deserve...
To feel creative and have fun
A hobby that you enjoy
Some time for yourself
Here are a few ways to help you find the time and space to practice.
Start Small
You don't need to put in an hours-long session every time you practice. Just start small (you might not be able to stop!) and you'll be amazed what you can achieve with a little time on the page.
Leave Your Supplies Out
Ever feel like getting out all supplies is a chore? Then why not leave them out?
Find a corner or a room in the home that can be your practice space and just leave your stuff out, ready to go. Not only does this make it easier to start, it also saves you from having to put everything away afterwards. Now that's a double win!
Decide What To Work On In Advance
Life's a lot easier when you know exactly what to do. Why would calligraphy be any different?
Save yourself from having to choose what to work on by deciding in advance. At the end of a practice session, write down what you want to work on next time so that you can get started right away.
Here are some specific ideas:
Basic calligraphy strokes
Transitions between thick and thin
Consistent letter spacing
Capital letters

The lowercase calligraphy alphabet written with a brush pen
Take A Calligraphy Course
If you want to understand the why of your practice, taking a calligraphy course is the perfect step for you.
Following a set curriculum with step-by-step instruction lets you always see how each lesson is part of a bigger whole. Every drill and exercise becomes a little stepping stone that fits seamlessly in a very clear bigger picture.
We have 20+ courses, 4 of which are free. You can browse courses here:

Make It Fun
Ultimately, never forget that calligraphy needs to be fun. Make sure you don't just do endless drills without ever working on things that interest you.
Think of calligraphy practice like learning an instrument. Instead of just practicing scales, you want to play actual music!
Easy tip: Seeing how far you've progressed can make your practice rewarding and fun. Redo an old piece and see how much you have improved.

"Enjoy the little things" digital calligraphy composition
Join Our Practice Challenges
Never wonder "what should I write today?" again by joining our daily practice challenges. These challenges are themed according to the month.
Use Our Prompt Generator
Challenge yourself even further using our quote generator.
We’ll give you an outline with a:
Quote
Writing utensil
Color palette
Lettering style or technique
Bonus accents
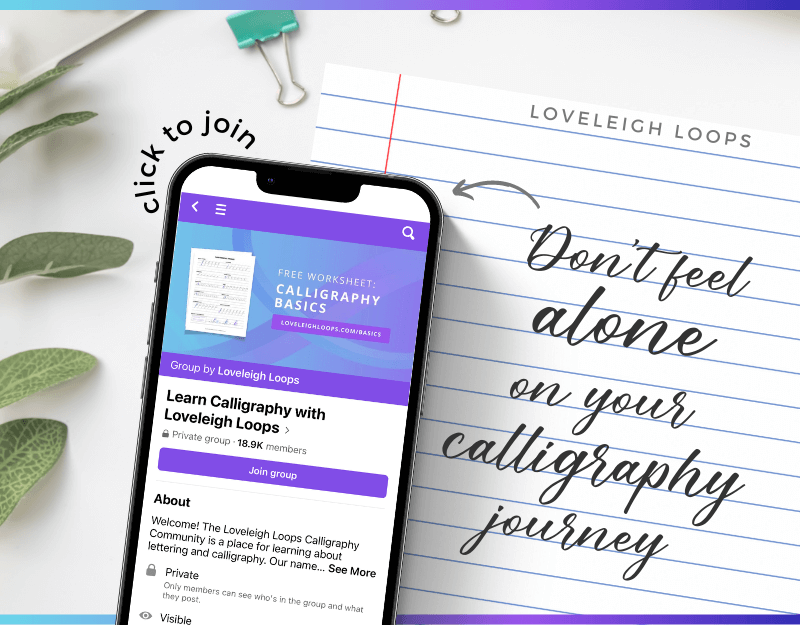
Get Community Support
EVERYTHING is more fun with friends - that's why we started our Loveleigh Loops Facebook group.
Come meet your new calligraphy friends! Jump in a conversation, or start you own. You can...
Say hi and tell everyone where you're writing from
Post a picure of your work and share what sparked your interested
Ask everyone what's helped them progress on their calligraphy journeys
Let’s Start Practicing Together!
We hope that you'll make yourself at home here at Loveleigh Loops. Calligraphy has changed our lives, as well as the lives of many of our students. Who knows how much a little fun and creativity could change yours 💙 💜
For more tutorials, subscribe to our YouTube channel or follow along on Instagram. You can start learning right away with hundreds of calligraphy and hand lettering videos.
