An Introduction to Pointed Pen Calligraphy
When you think of calligraphy, you might think of the beautiful script seen in old photos and movies, or maybe a fancy wedding invitation you received.
It might look both impressive and impossible, but we promise that it’s totally possible for you!
Pointed pen calligraphy differs from brush lettering because you use a metal nib dipped into ink to write.
Pause and pin for later!

Table of Contents
Pointed pen calligraphy got its name from the type of pen used in the art.
The tool has two parts:
A pen holder (the main piece that you hold in your hand), and
The nib (the part you can switch out and that you actually dip into ink)
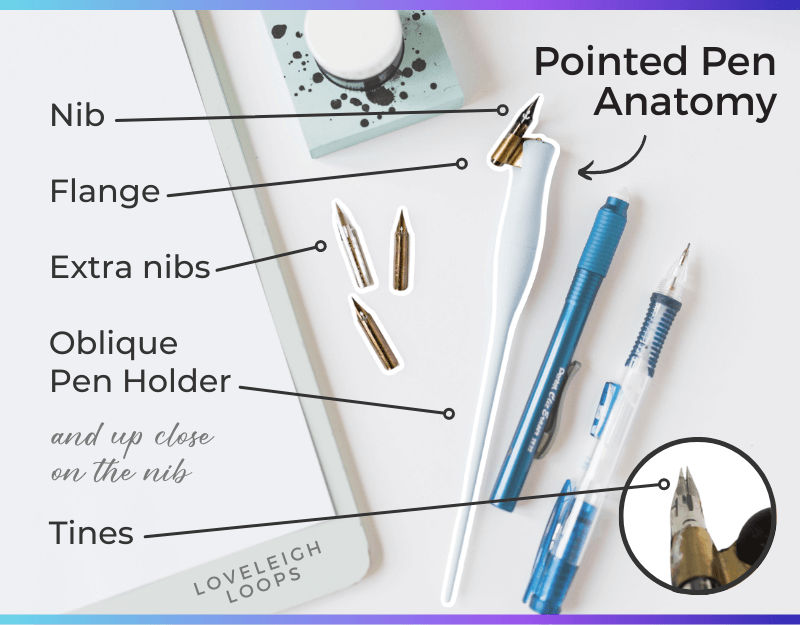
There are other types of metal nibs that can be used for calligraphy such as a broad edge or round nib, but in pointed pen calligraphy, the nib comes to a sharp point at the top (hence the name: pointed pen.)
When you apply varied pressure to the nib, the thickness of the lines change. Pressing harder creates a thick line, while gliding just the tip of the sharp nib produces a thin line.
Just like other forms of lettering, it takes trying out different types of nibs to determine which brands and sizes help you accomplish the style and look you want. Some of our favorites are the Hunt 101 and the Nikko G. There are countless types of nibs (read more about our favorites here), so as you get more practice, you can experiment on your own with other nib brands and sizes to see which one suits you best.
Our Facebook group is an excellent place to ask other artists what nibs they use and recommend so you can discover more options.
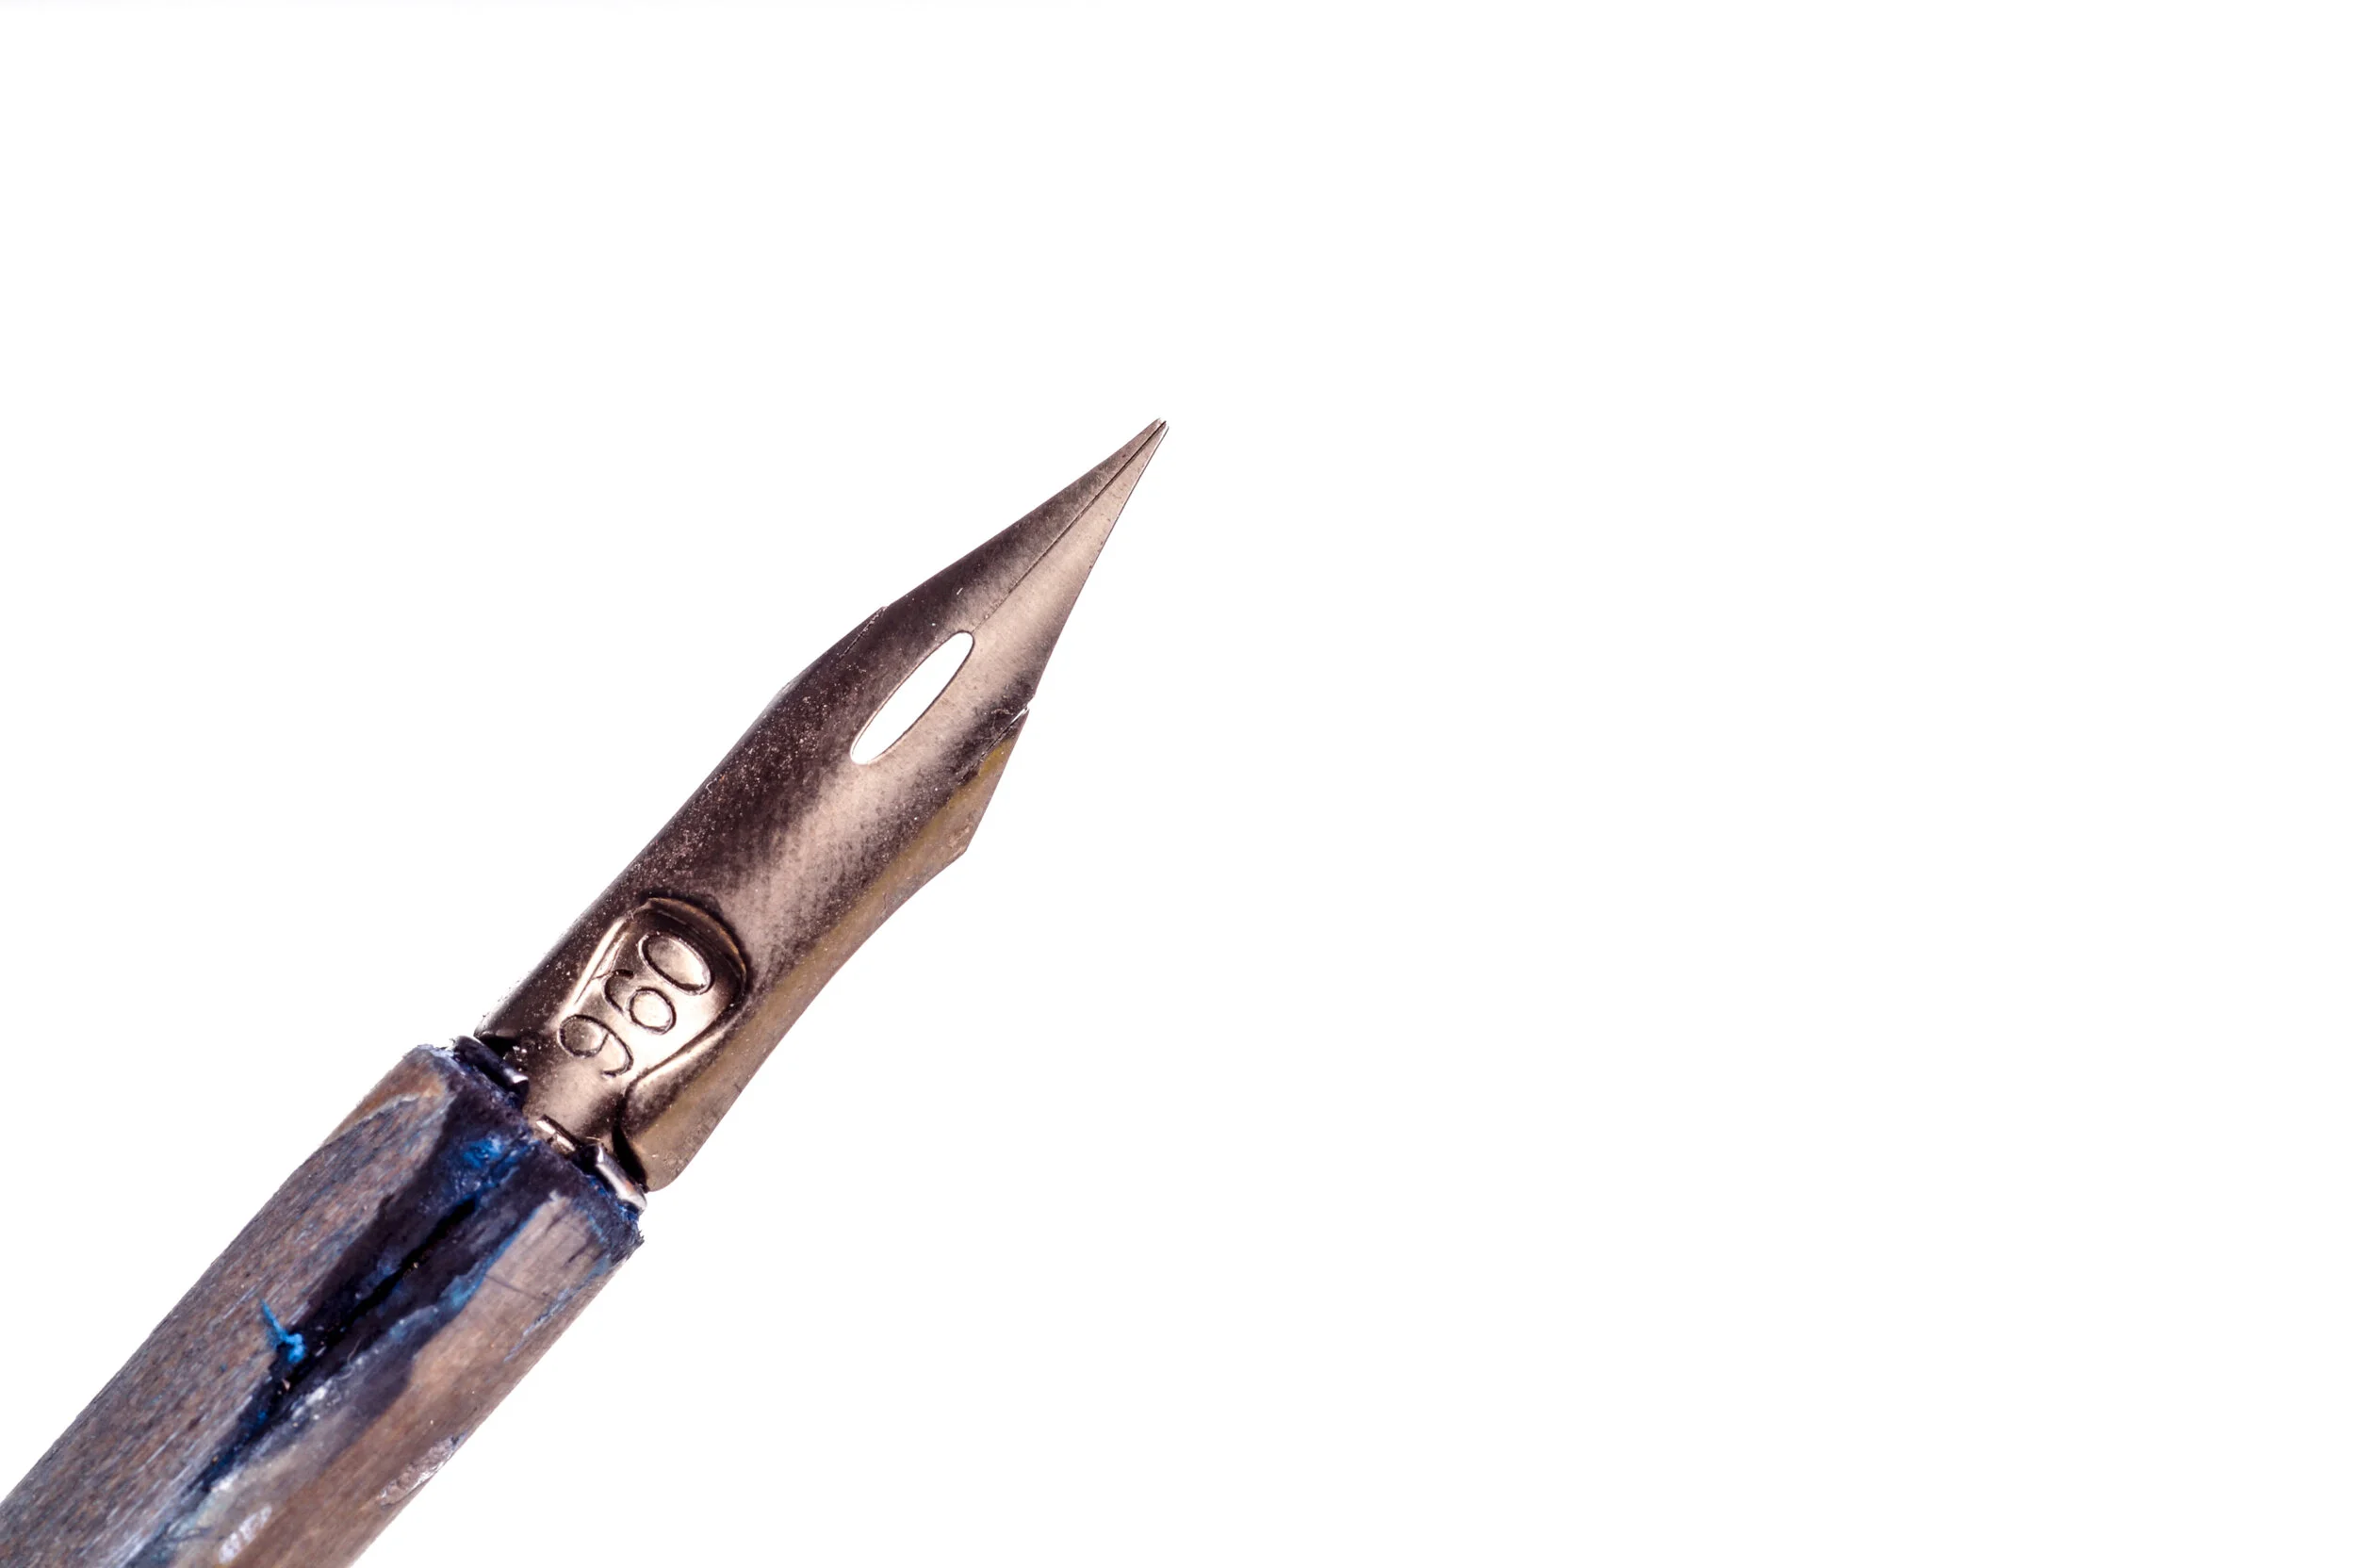
calligraphy nib
How to Choose Your Penholder
There are two types of penholders in pointed pen calligraphy: straight and oblique. In the video above we’re using an oblique penholder, which we recommend for right-handed beginners.
The oblique penholder helps you to remember to hold the pen at an angle, which allows you to get the correct line thickness you want. This is a great place to start if you’re trying out pointed pen calligraphy.
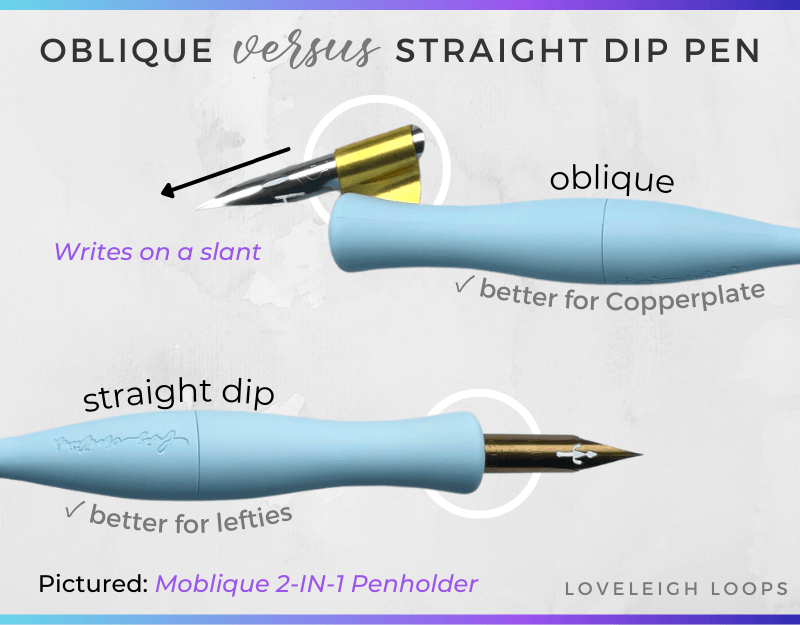
Oblique pointed pen vs straight pointed pen
If you’re left-handed, you’ll probably want to use a straight holder instead of an oblique, although there are some amazing lefties like Younghae Chung who use obliques to create beautiful art.
Penholders range widely in price, and you don’t need to invest a lot of money into one as a beginner. Once you’ve gotten the hang of the style and you want to elevate your craft, you can invest in a higher quality penholder.
You may also like: How To Put Together A Pointed Pen
How to Clean Your Pointed Pen Nib
Because you’ll be dipping your nib into ink, you’ll want to ensure they’re nice and clean when putting them away so the ink doesn’t dry and stuck to the surface. Most of the time you can simply clean then with water and wipe dry with a towel. But rubbing alcohol or a specialized pen cleaner works well if your ink is sticking or dried.

Traditional calligraphy written with a pointed pen
You may also like: Copperplate Capital Letters Beginner’s Guide
How to Prep Your Nib
When you get out a brand new nib, it has a protective coating that was applied by the manufacturer. The coating has to be removed so that your ink can adhere to the surface rather than pooling up and sliding off.
To prep a nib, you can use any of these options: dish soap, toothpaste, Windex, rubbing alcohol, or your saliva.
Apply your choice to the nib with a paper towel and wipe the nib repeatedly to remove the coating. Then wipe off with water before dipping into your ink. If the ink still doesn’t stick, go through the process again.
You’re Ready to Write!
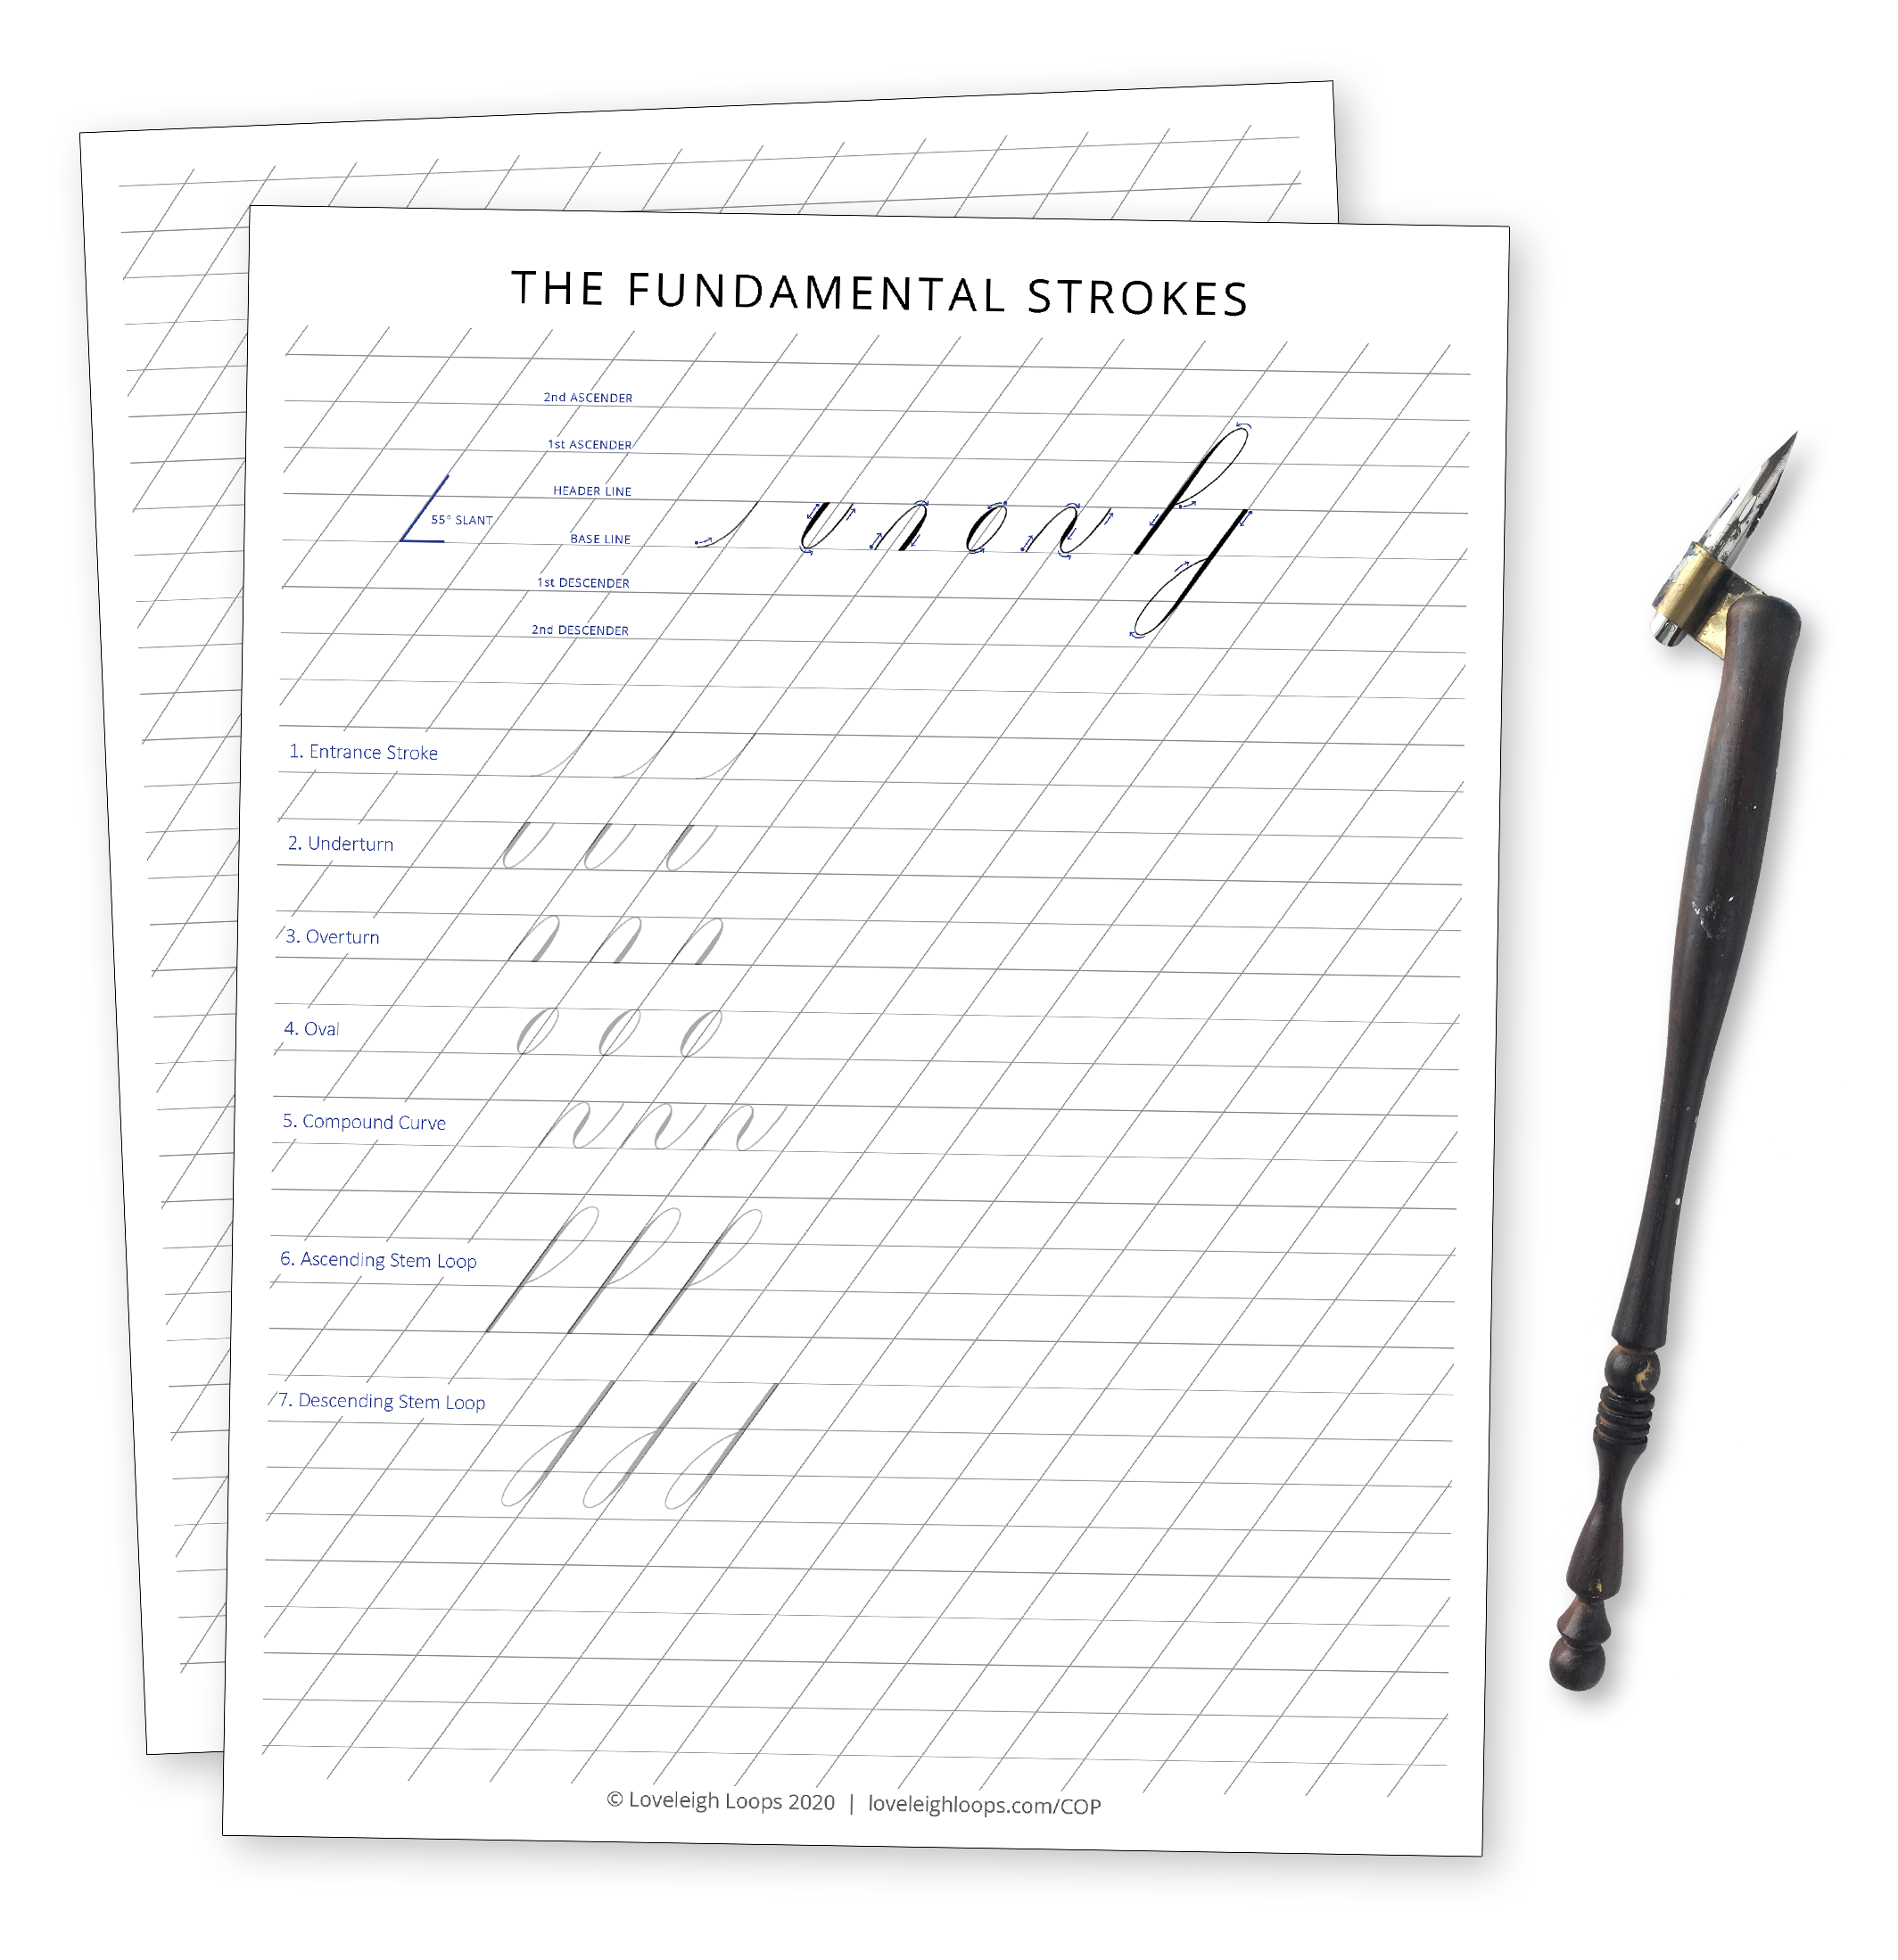
We recommend learning the rules of calligraphy and practicing based on those rules.
That includes using guide sheets to maintain consistency in your slant and the baseline of your work. For more on this, watch our video below.
Free Guide Sheet
Download the free guide Copperplate sheet: