
How to Print from the Procreate App
Procreate allows you to create digital calligraphy, but sometimes you want a printed copy of your piece.
Whether it’s for your portfolio or to give as a gift, it is possible to transfer your on-screen artwork into a physical piece.
Instead of starting with how to export your work to a printer, let’s start from the very beginning of creating your canvas.
Pin it for later! ↓
Table of Contents
Step 1: Set Up Your Procreate Canvas
Preparing your canvas before you begin your project is important. (Already created your project? That’s fine, just skip to Step 3.) Setting your canvas dimensions at the start will help you avoid any issues such as creating a file that’s too small that would be blurry when printed, or using the wrong proportions.
Canvas Dimensions
Create a new canvas and set it to the physical dimensions of what you want to print. For example, if you’d like to print a Letter-sized design, set the dimensions to 8.5x11 inches.
Set DPI to 300. DPI stands for “dots per inch” and is the number of ink dots the printer can squeeze into an inch of the paper. A higher DPI gives you a better quality image. Here’s how:
In the Gallery view, create a new canvas (top right corner) and choose Custom Dimensions (top right icon).
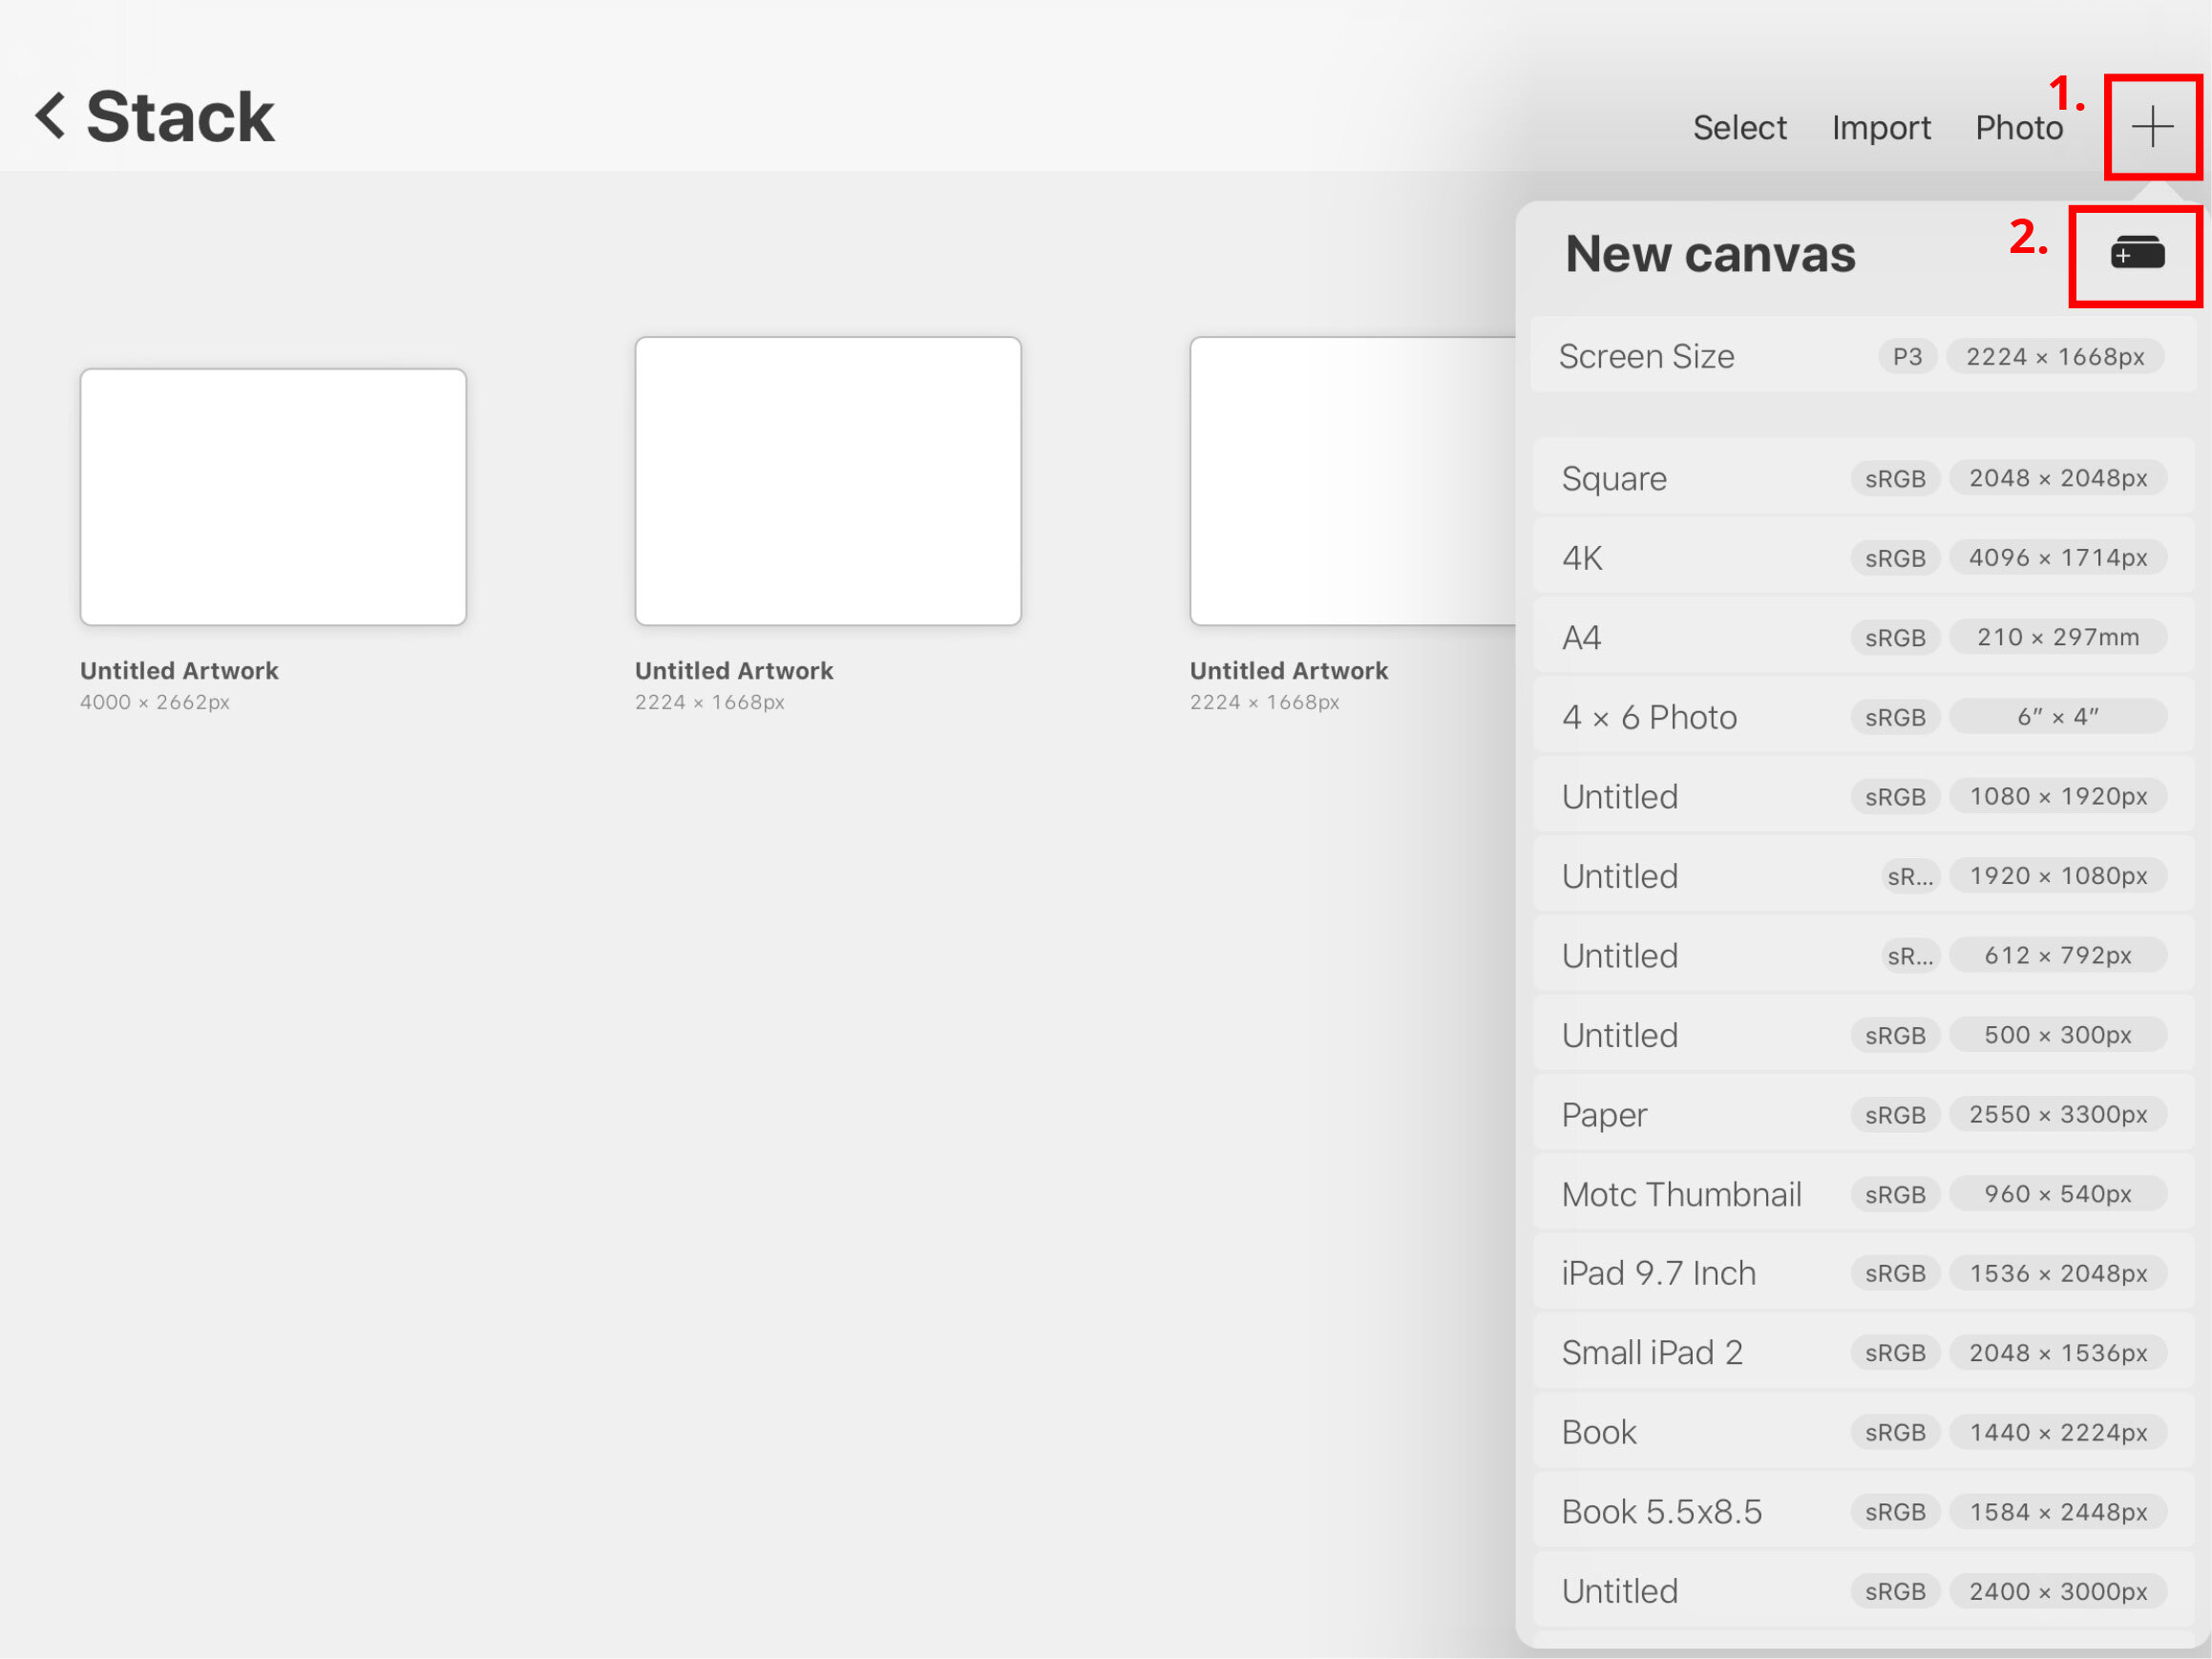
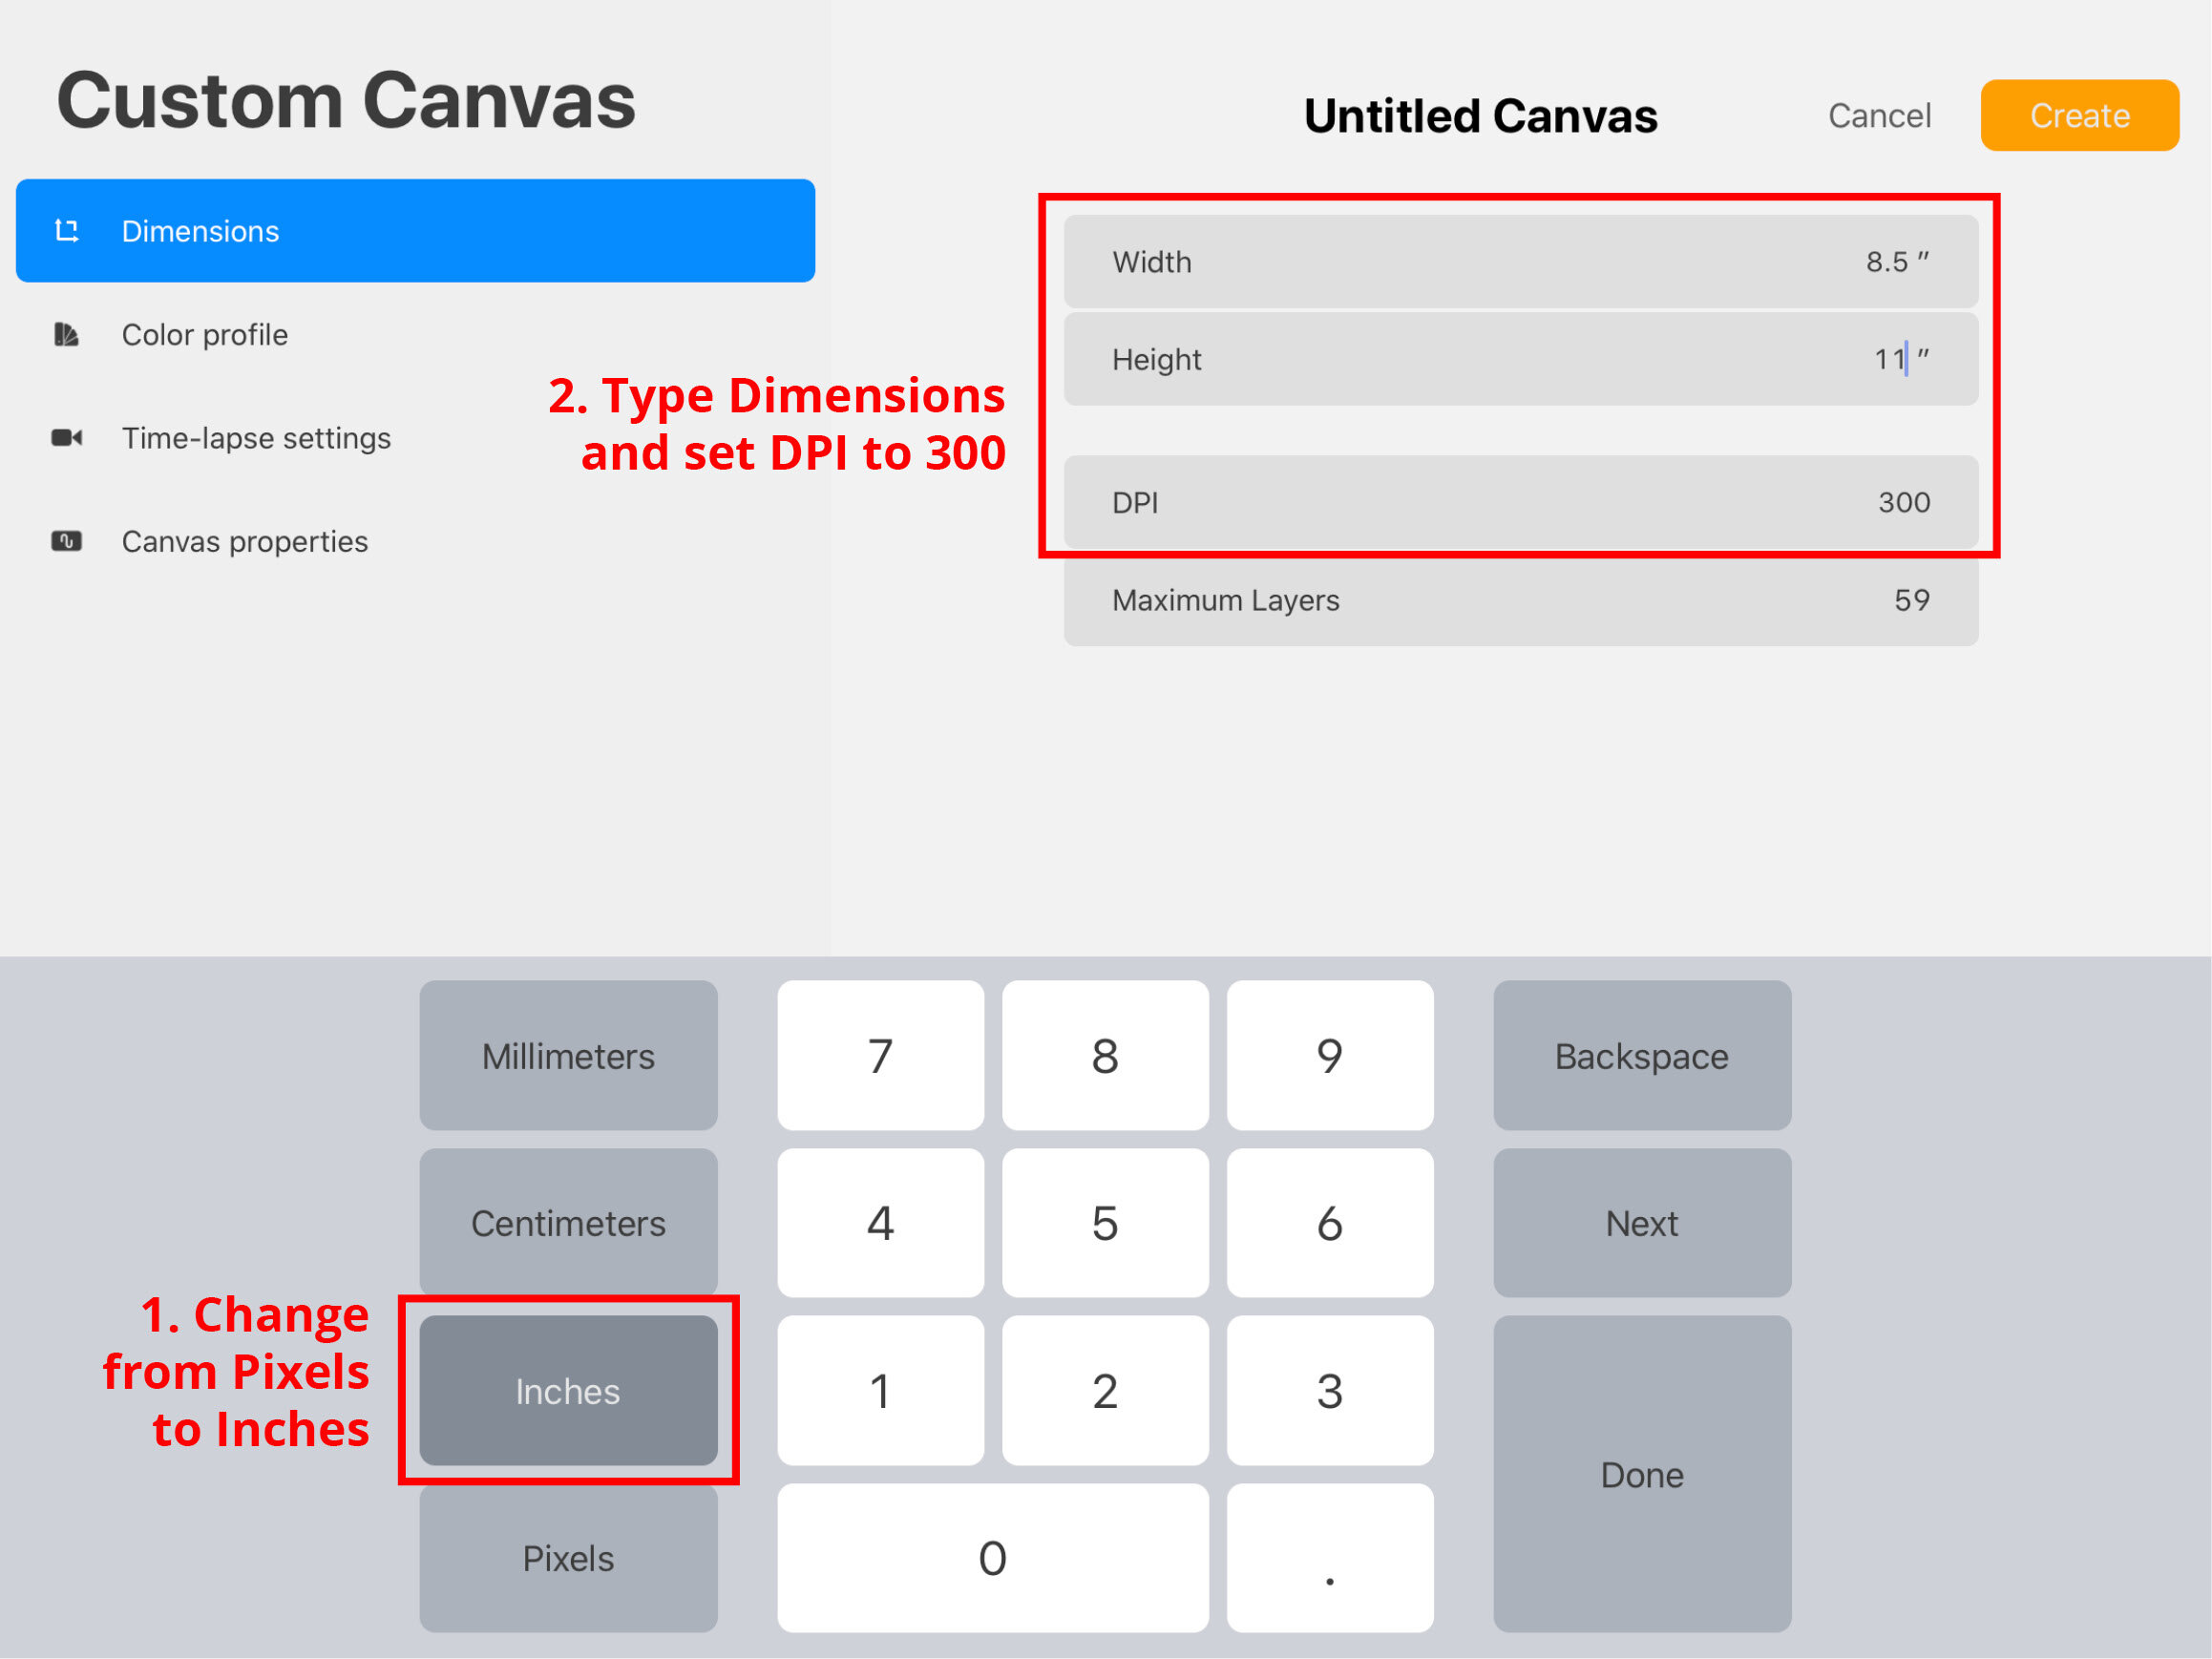
Adjust the dimensions and DPI settings. Note: You can set your dimensions to inches instead of pixels at the bottom next to the number keypad.
If your design isn’t the same proportions as your paper (for example, if you want to print a square image on letter-sized paper), simply set the dimensions to your square size.
Remember that it’s always better to make your canvas too big than too small. If you start with a small canvas, printing it at a larger size will result in a blurry image. Starting too big and scaling down will still give you a clear result.
You may also like: Which iPad To Buy For Procreate
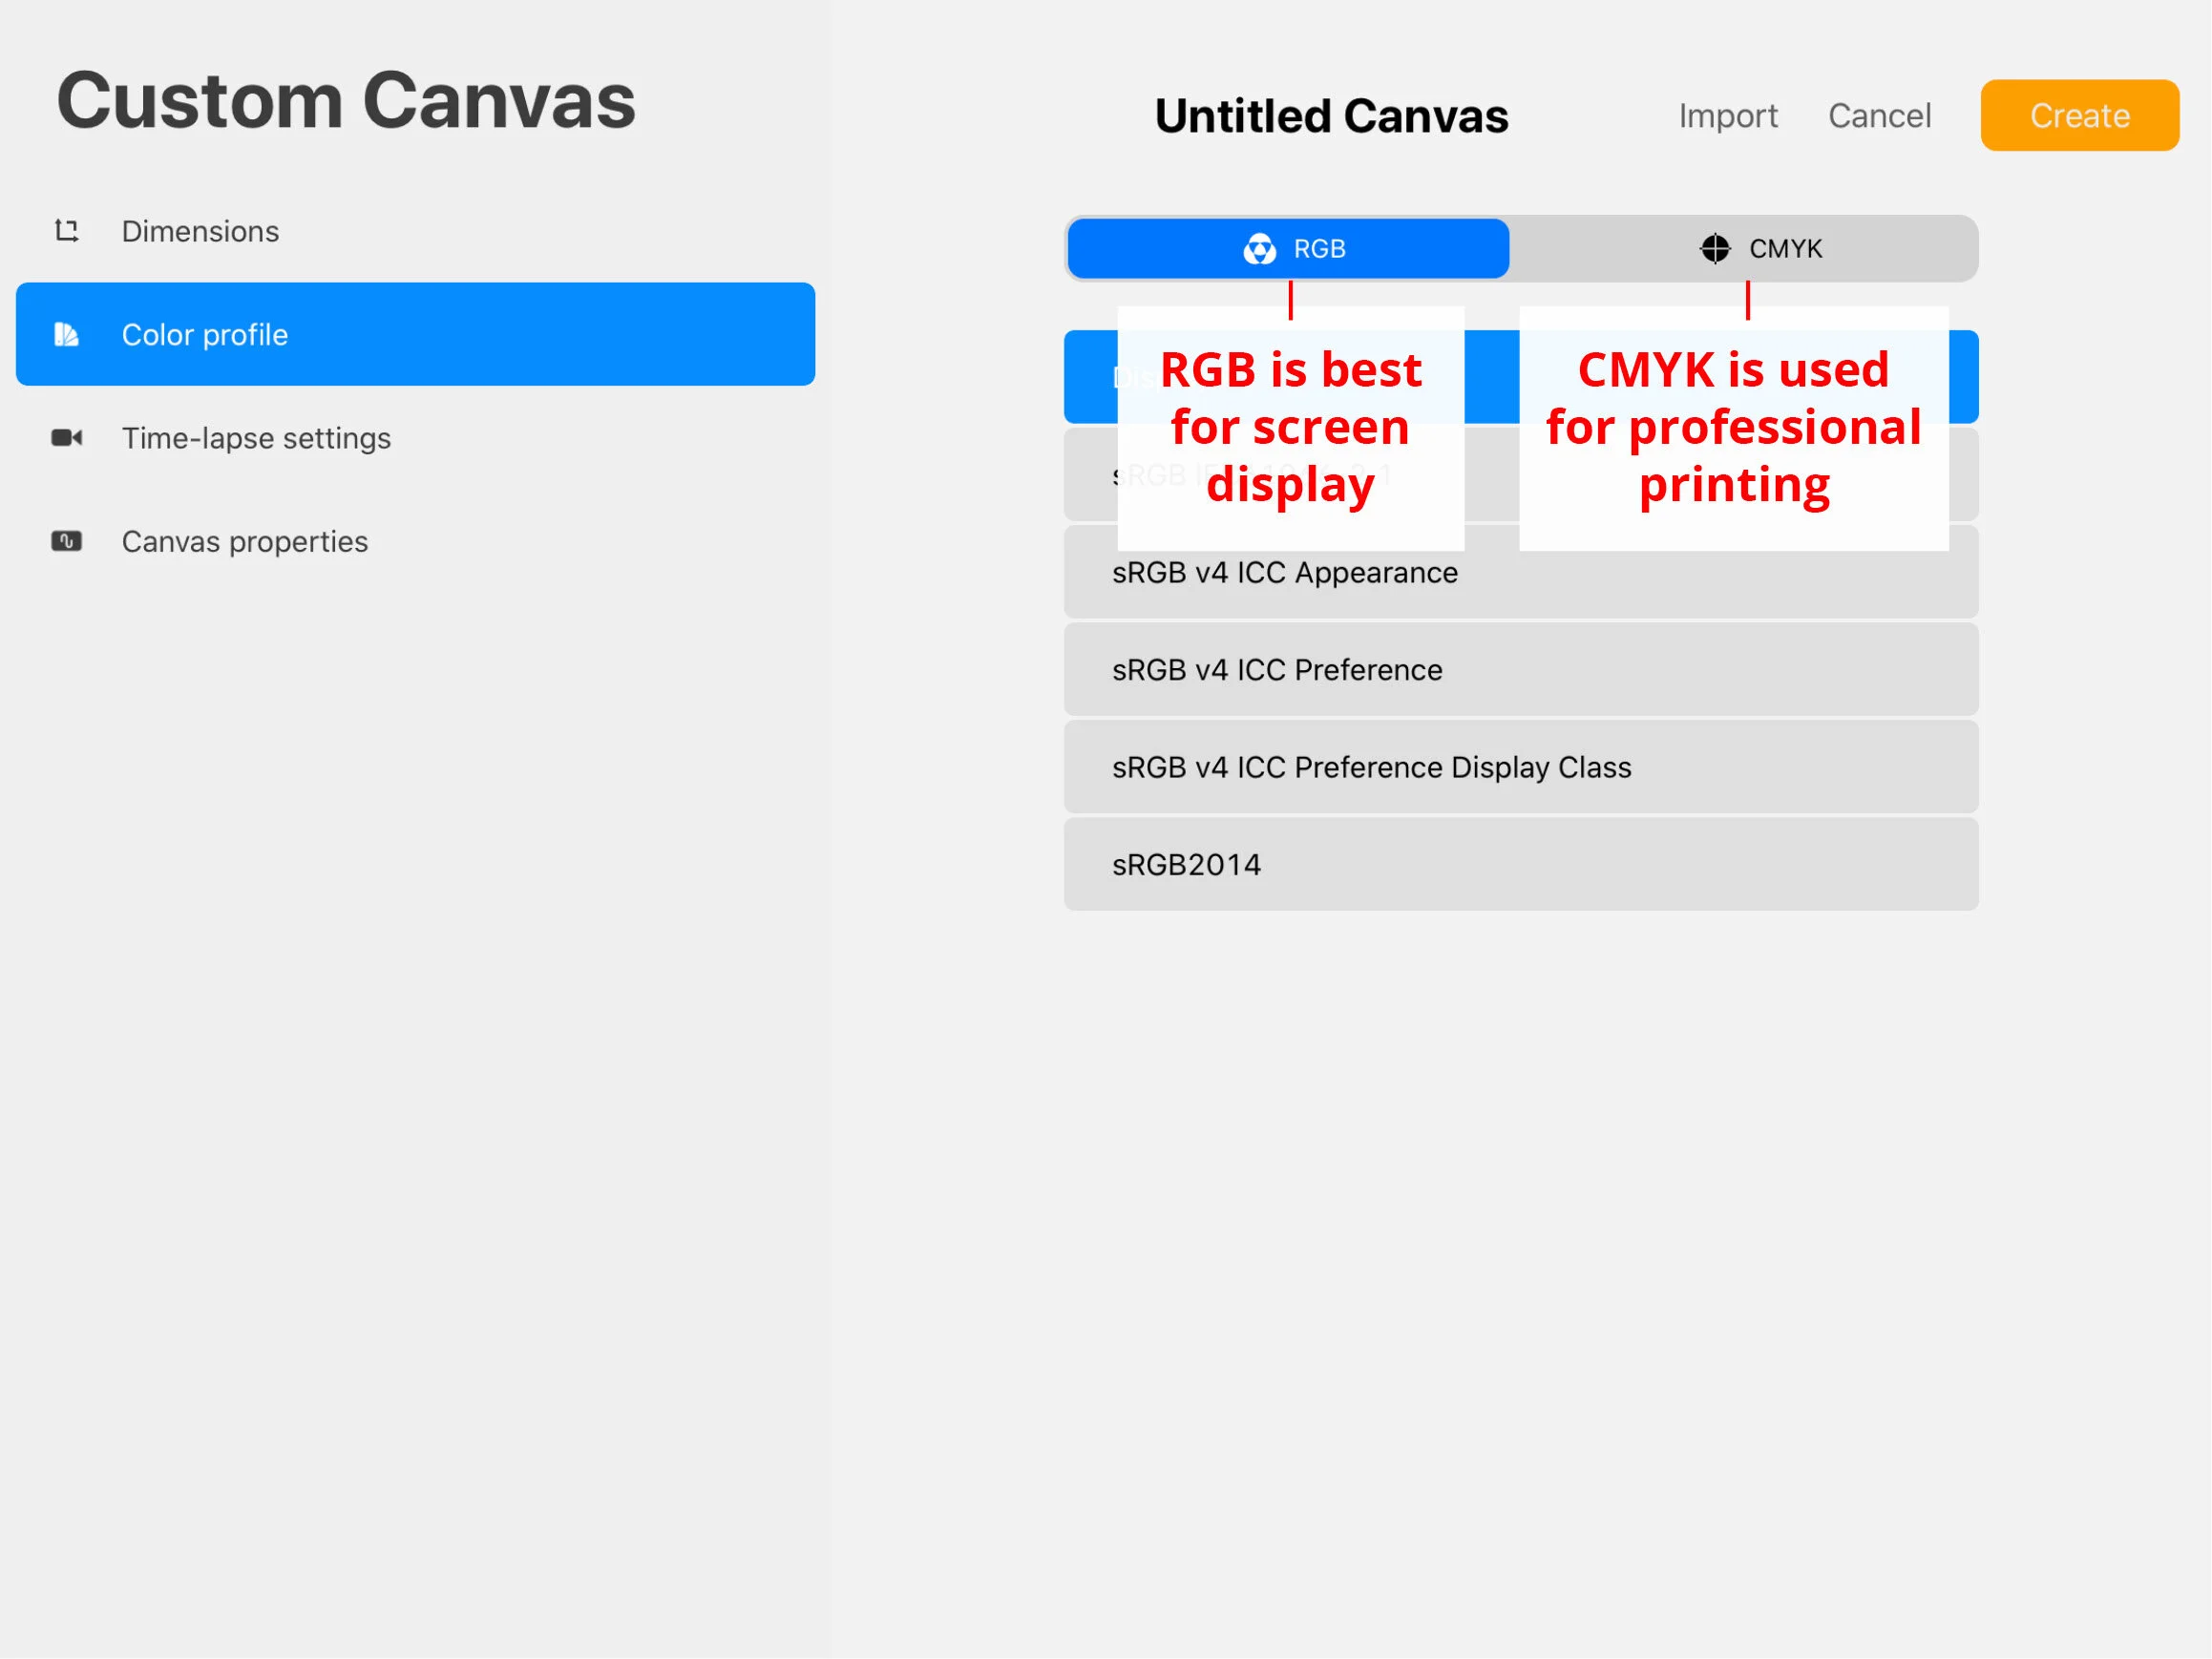
Color Profile
There’s lots of confusion around Color Profile with some people saying that you HAVE TO USE CMYK in order to print. That’s not *exactly* right… there’s nothing stopping you from printing an RGB image. You don’t have to convert it to CMYK in order to print.
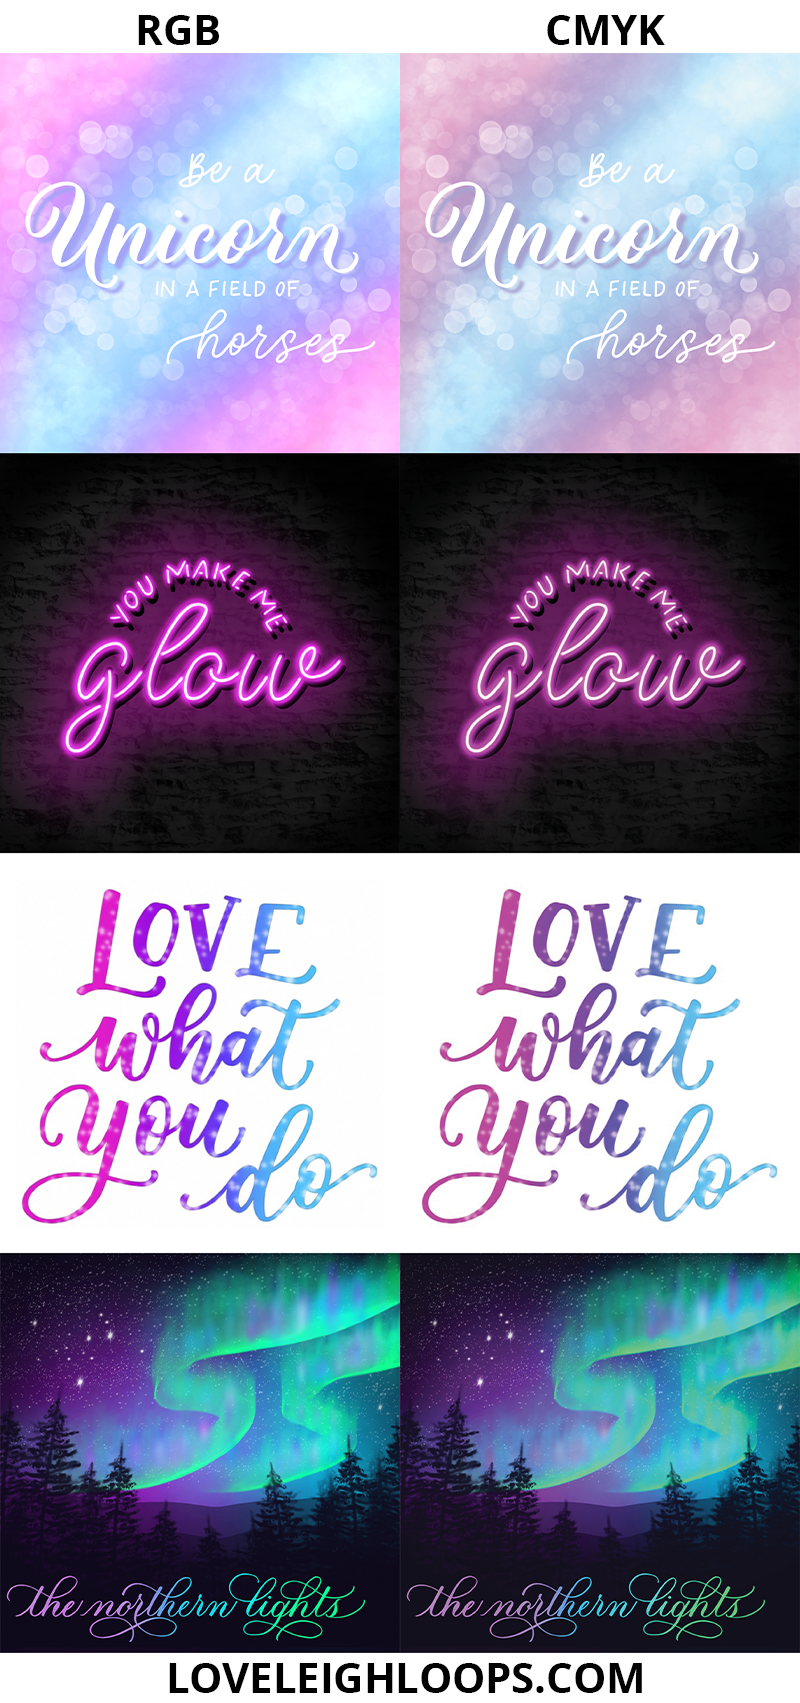
However, the colors may show up differently when the design is on paper because the color is created with dots of ink instead of pixels of light. Here’s an example of the difference:
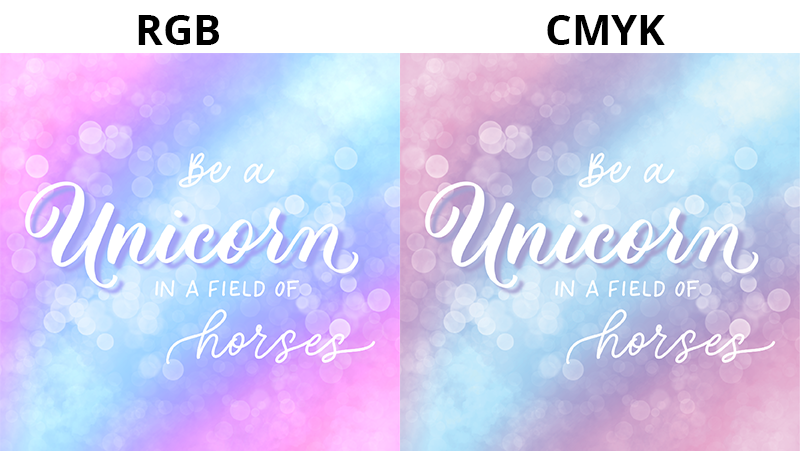
If your main goal is to print your work, and you want your artwork to look like the end result while you’re working on screen, set your Color Profile to CMYK. This will dull your color palette but it will make the colors match better with your final physical piece.
But if you intend to display your work on a screen and print a copy of your work as a backup, use the default RGB Color Profile. We’ve even read that some at-home printers can closely match the look of RGB, so unless you’re using a print shop or other service, you can probably get away with using RGB. (Also, if you’re using black and white or a very muted color palette, then there won’t be much difference anyway.)
Learn more about RGB vs CMYK at the bottom of this blog post.
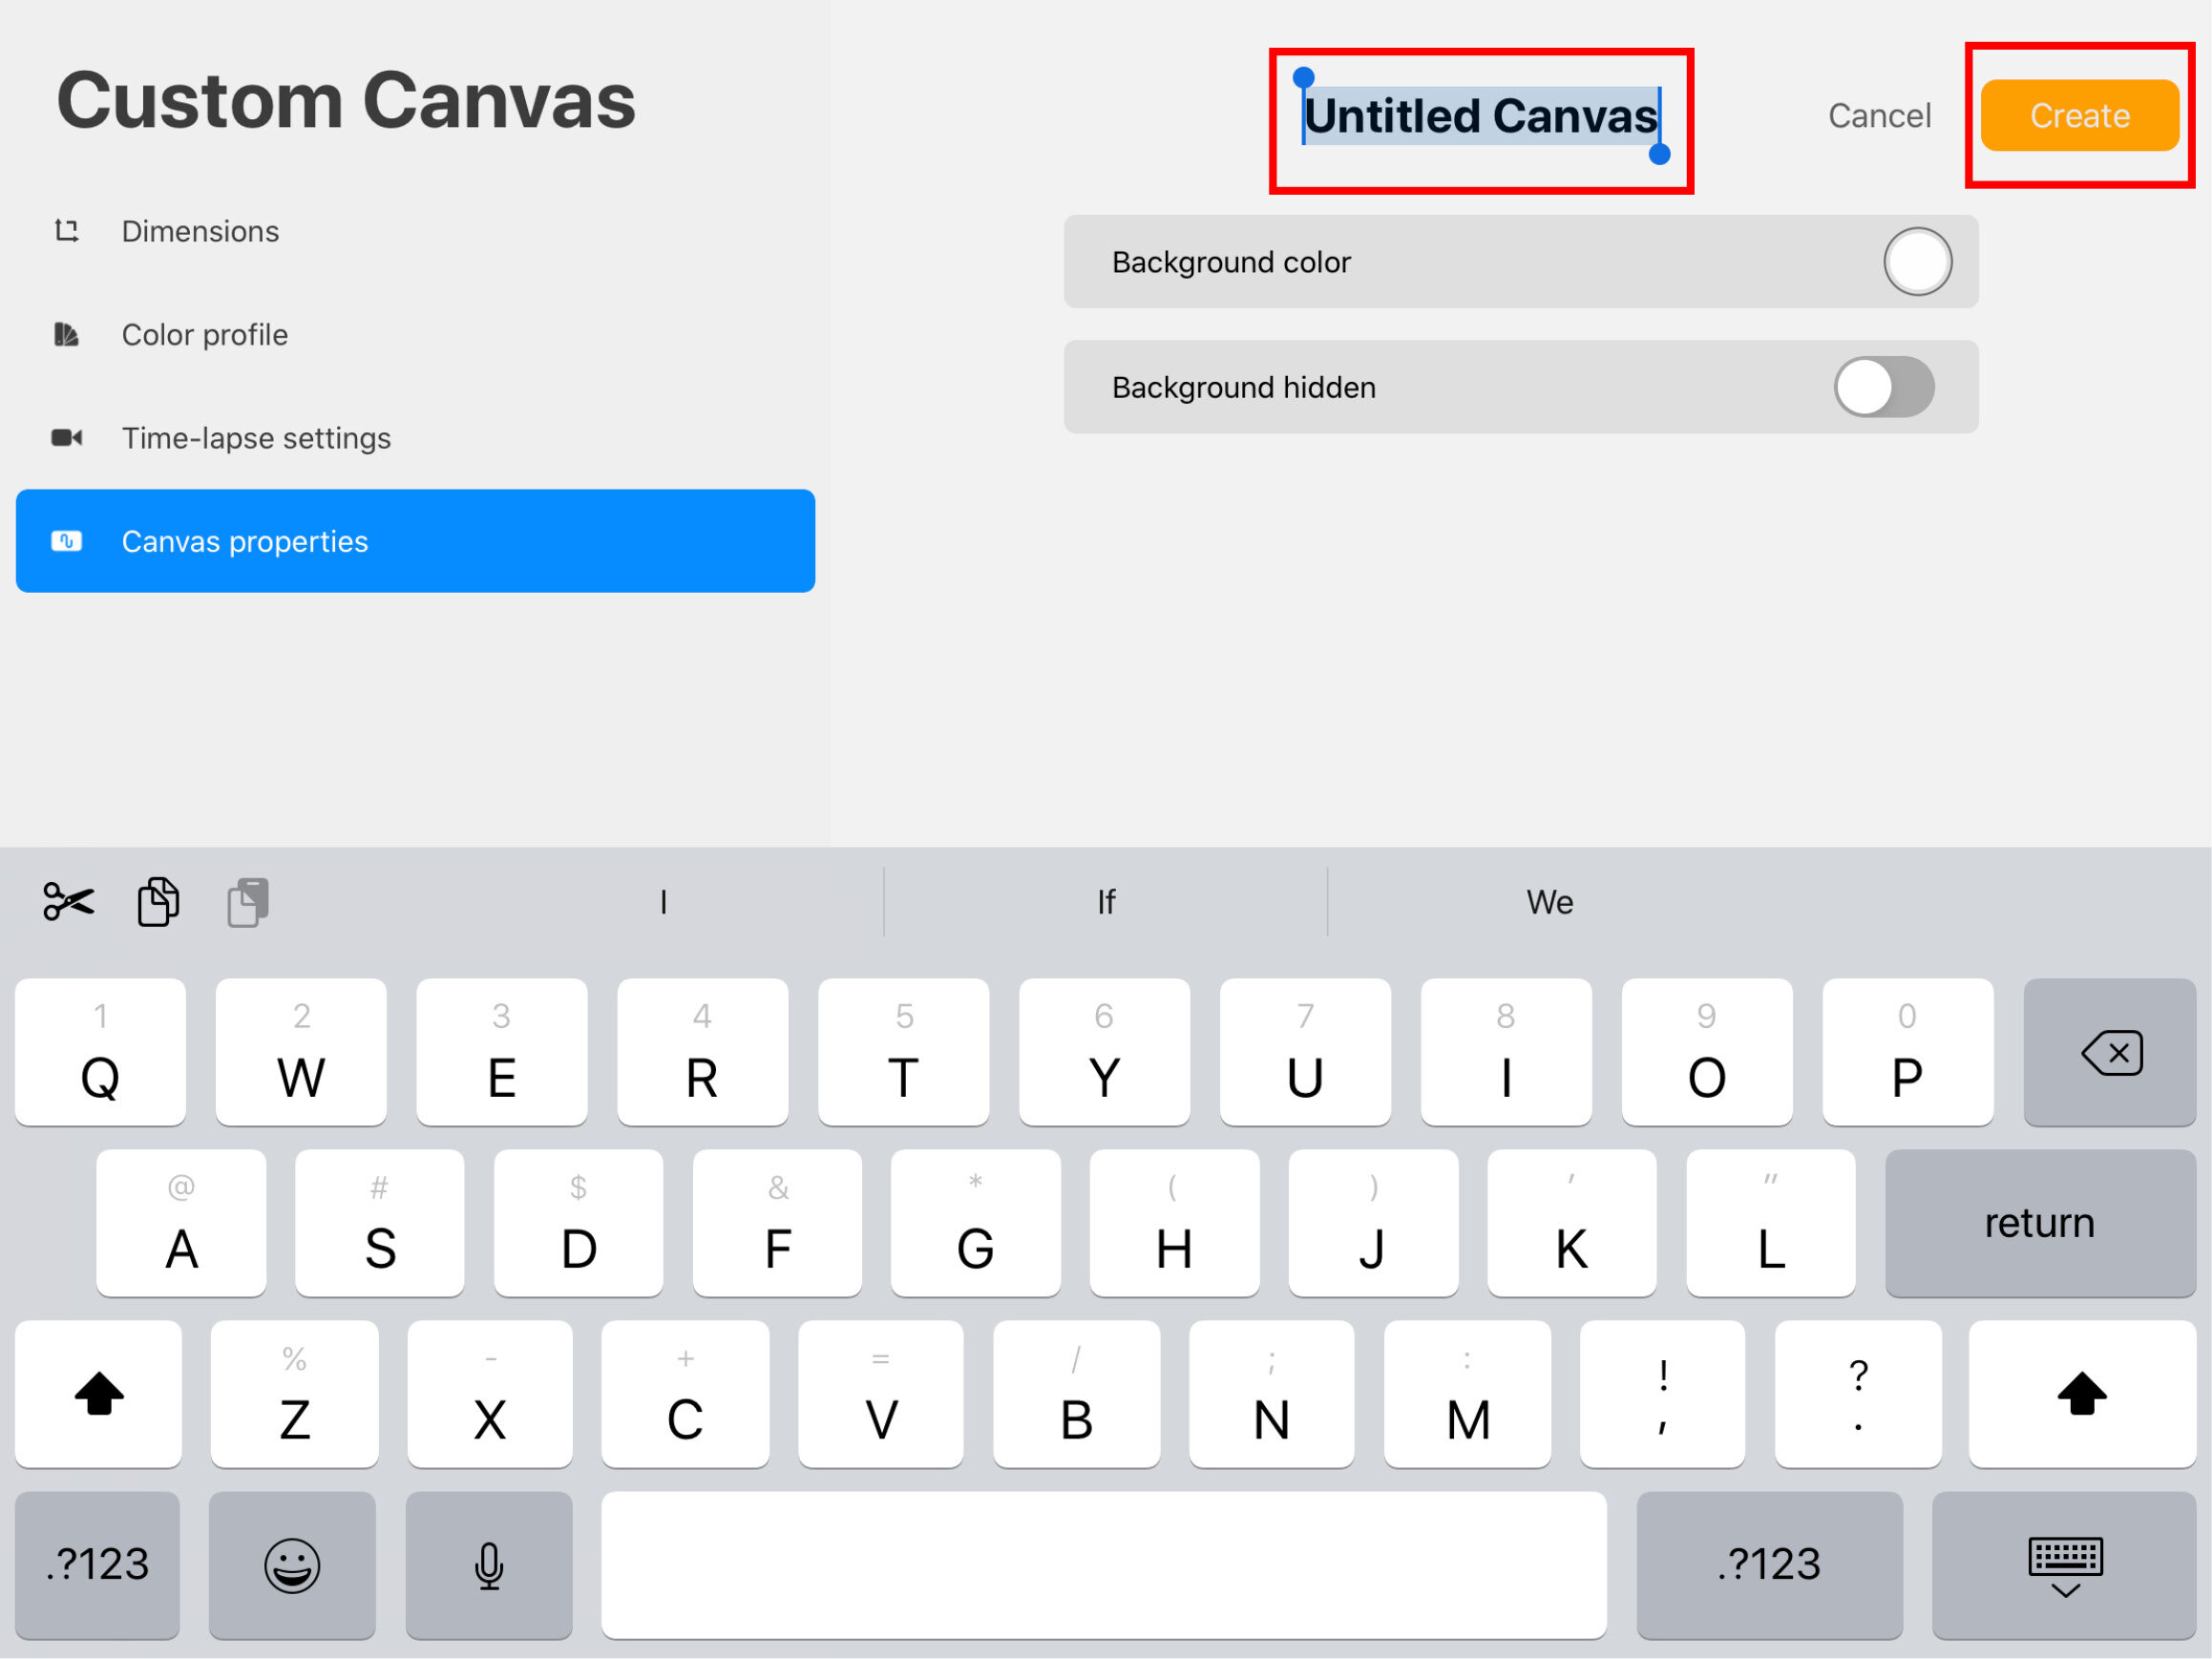
Save Custom Canvas Size
If you’d like to re-use the canvas dimensions you’ve just set up for future projects, you can name this template. In “Canvas Properties”, tap the words “Untitled Canvas” and type in a descriptive name that includes the dimensions and DPI. Then choose Create. Next time you create a project, you’ll be able to select this template from your list of canvas sizes.
Set-Up Note: If you’re using a print shop, ask what their specifications are first. They may have specific dimensions, DPI, or Color Profile they want you to use.
Step 2: Create Project
Your turn! Create your piece in Procreate. Remember, if you set your canvas size to the size of a piece of paper, filling your entire canvas will fill the whole page once you print it.
Step 3: Export Your Project
When you’re ready to print, you’ll need to get your design from Procreate onto your computer in order to print it. (Note: Some printers have the option to connect via bluetooth to your iPad so you can try that out if you have one, but we always use the computer method.)
How to export a Procreate project as a PNG file:
Open the Actions Menu (wrench icon).
Select Share.
Select PNG.
Send the PNG to your computer via email, AirDrop, DropBox, or your preferred transfer method.

Or, if you have a printer that can connect to your iPad wirelessly, you can print directly from this screen.

Once the image file is on your computer, open the PNG file and choose File > Print. View the Print Preview and make sure it looks correct; you may need to choose "Print Entire Image". If you don't want to print a full-page version, you can scale it down in the Printer settings.
If you want to re-size your image or print multiple images on the same page, you can insert the images into a program such as Microsoft Word or InDesign, make your changes, and then press print.
File Type
We typically use the PNG file type for images, but you can also export your project as a PDF and it will retain the quality and dimensions. Just open the PDF on your computer and choose File > Print. You won’t be able to insert the PDF into a program like Word to create a collage or resize/crop the image, so a PDF is best for printing as-is.
If you’re using a print shop instead of printing at home, check with them on what file type they require.
You may also like: Procreate Calligraphy Ultimate Beginner Guide
Further Reading
To learn more about setting up your canvas size, check out this calculator from Bardot Brush.
If you’re interested in getting your designs printed on products, this blog post from Liz Kohler Brown is a great source of information
If your printed projects look very different in color compared to your screen, you may need to calibrate your screen. Teela shares her printing and color calibrating process here.
What’s the difference between RGB and CMYK?
RGB is the color mode that combines Red, Green and Blue light to create the colors you see on screen. It’s the default for Procreate and is great for sharing artwork online. Have you ever noticed that when you print something, it doesn’t look as bright as it does on a well-lit screen? Part of that is because of the absence of light shining from behind the image, but also because printers print in a different color mode: CMYK. This stands for cyan, magenta, yellow, key (black) and corresponds to the ink cartridges inside the printer.
Based on our research, modern home computers are able to take an RGB image and print it with similar results. However, some print shops only print with CMYK and may require that type of image file. They may be able to convert the image for you. So, unless you really want to make sure that your on-screen artwork looks exactly like it will look when printed on a CMYK printer, you can stick with the default of RGB. If your main intent is to share your work online, definitely use RGB and just be aware that printers can’t always replicate an on-screen effect perfectly.
How to Design and Print a Greeting Card in Procreate
Check out our blog post to watch as we create a greeting card and print it using just the Procreate App! Read more here.
