
8 Basic Calligraphy Strokes (History + Free Worksheet!)
To the untrained eye, calligraphy can look incredibly complex. We understand that; it’s a delicate artform, after all! But hang out with us at Loveleigh Loops and you’ll start to see the magic and intention behind every single stroke. Today we’re going to distill the wonderful art of calligraphy into just 8 basic calligraphy strokes that you can practice to perfect your entire lowercase alphabet.
This blog post has something for everyone: beginners will enjoy the simple break-downs, and seasoned hobbyists will love the history behind each of these strokes. Let’s get our pens out and dive in!
Table of Contents
Don’t forget to pin it so you can find and reference later! ↓
Intro To Basic Calligraphy Strokes
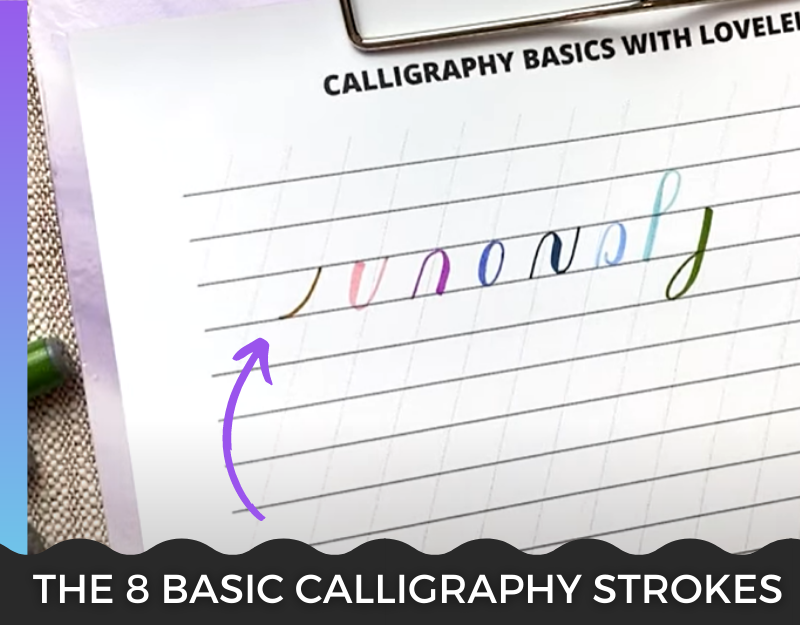
The basic calligraphy strokes are simply the individual strokes you get when you break apart lowercase letters into their fundamental pieces.
These strokes are the very basics of calligraphy: every lowercase letter is built using a combination of these basic strokes.
We’ll show you how each stroke presents independently, as well as how it looks in the context of an entire word.
That being said, don’t rush into practicing the basic strokes in word-form.
Calligraphy letters are best practiced stroke-by-stroke, until you can get to building letters and eventually words.
The calligraphy basics are built upon layers of practice and learning, so don’t be shy to break out the paper and pen and get involved. We’re right here cheering you on!
You may also like: The Copperplate Capital Letters

Practicing Calligraphy
As you practice these 8 basic calligraphy strokes, it’s important to remember that calligraphy is not the same as cursive writing.
They’re related styles of penmanship, but they differ in one fundamental way: when writing cursive, each letter is connected and the writing utensil doesn't leave the page between letters.
When writing calligraphy, on the other hand, the pen does leave the page, within words and even within individual letters. (Learn more about the difference between cursive vs. calligraphy here!).
Those individual parts of letters are exactly what you’re learning here today. Every sentence, every letter written in calligraphy is built using the same 8 basic calligraphy strokes. That’s what makes calligraphy so easy to practice and learn!
Instead of practicing countless words or the entire alphabet, you can master the 8 discrete strokes instead. Much easier to focus on just 8 things, right?
Mastering these basic calligraphy strokes is going to open up many doors for you, and we’re so thrilled you’re learning with us here today.
We made you free practice sheets to help make practicing easy ↓
While you’re practicing, keep in mind that the aim isn’t perfection, but consistency! Use the practice sheet and watch our video tutorial for extra tips.
What You Need
It doesn’t take much to start trying your hand at the basic calligraphy strokes, but a few tools will help set a good tone for your practice.
Pen
In the video and pictures, we’re doing our basic strokes with a basic small brush pen. This utensil works well for these strokes because the stroke thickness is determined by pressure on the pen: it creates a thicker line when your press down harder on the page.
A general principle of these basic calligraphy strokes is that downstrokes (strokes coming towards you) are thicker and upstrokes (strokes moving away from you) are thinner. This is known as brush lettering or brush calligraphy.
No brush pens on hand? A utensil that is sensitive to pressure will be your best resource for practicing the basic strokes, but don’t let lack of specific tools deter you.
It’s possible to practice calligraphy basic strokes with pencil or a ballpoint pen. When you’re ready to invest in your new hobby, make calligraphy pens your first investment. We know you likely love pens as much as we do :)
You may also like: How To Use Brush Pens
Practice Sheets
Your strokes and letters should not be upright, but at a slight angle to the baseline (kind of like an italic font). For best results, practice these basic calligraphy strokes on guide sheets with diagonal lines. The slanted lines keep your strokes at a consistent angle as you practice. You’re welcome to use our basic strokes worksheet!
We have 20+ free calligraphy practice sheets that you can download at any time.
Just Plain Practice
Learning calligraphy is a hobby that requires practice, so this is an intangible but essential tool! These strokes are the building blocks on which the entire basic calligraphy alphabet is built, so don’t forget to put some time in practicing each stroke individually.
The 8 Basic Strokes Of Calligraphy
Let’s dive into the basic strokes! For a deeper dive on each of these, see if our calligraphy courses are right for you. You can purchase courses individually or get them all together in Loveleigh University which opens for enrollment twice per year.
Read on or watch this basic calligraphy tutorial on our YouTube channel ↓
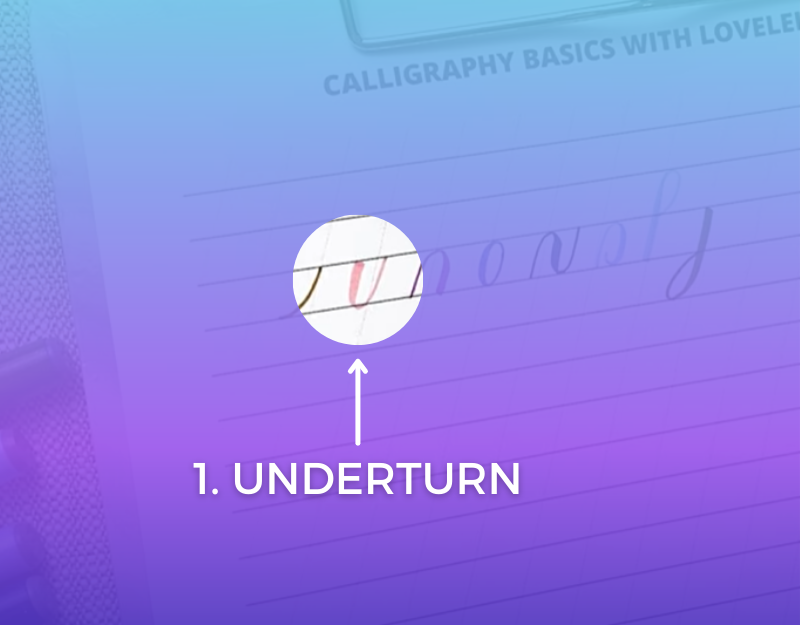
1. Underturn
You may also like: Our Favorite Calligraphy Supplies
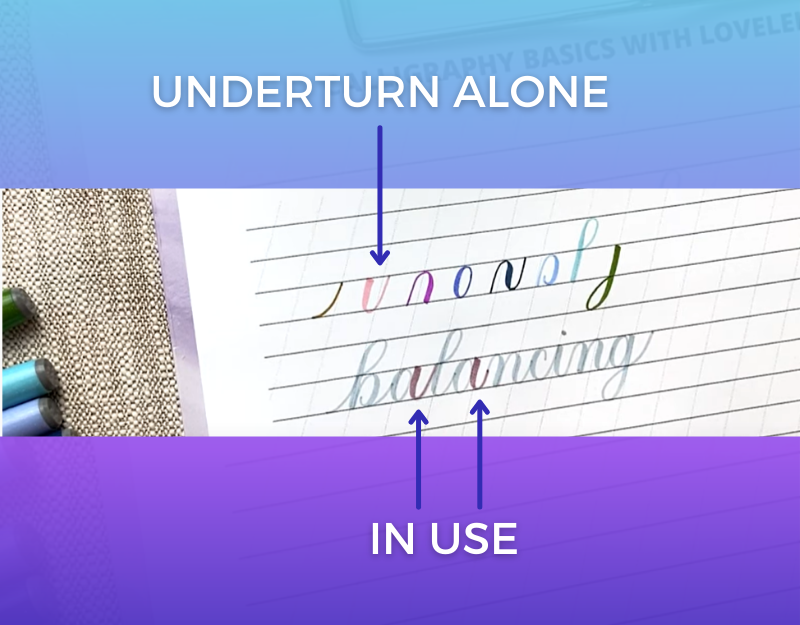
An underturn starts with heavy pressure coming down, curves at the bottom, and then finishes off with a light pressure thin stroke going up.
In the word balancing, you can find the underturn in the letters ‘a’ and ‘i’.
You may also like: Celebrate World Calligraphy Day
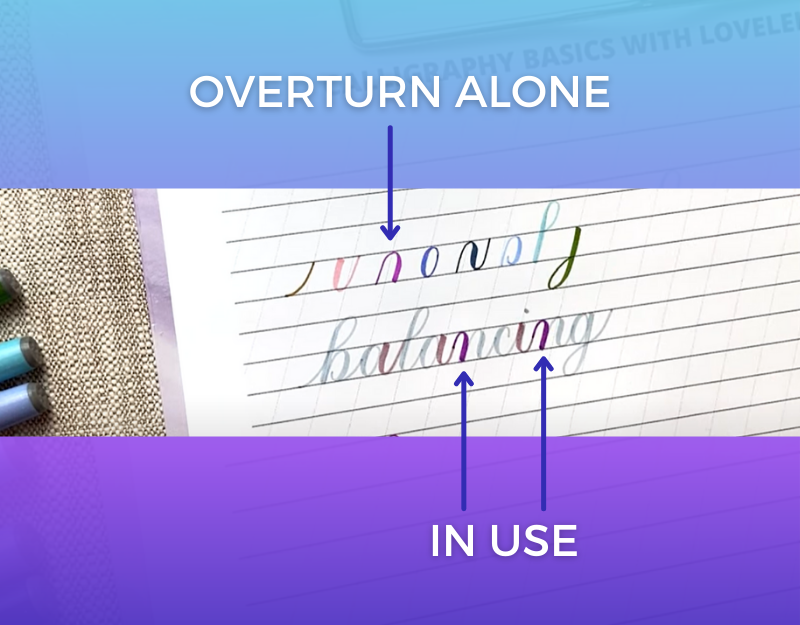
2. Overturn

An overturn is the same as an underturn but upside down. Start at the baseline, with thin light pressure going up, curve at the top, and then go back down with thick pressure coming down.
In the word balancing, you can find the overturn in the ‘n’.
You may also like: Calligraphy Courses Directory (Free + Paid)
3. Oval

An oval can be tricky for beginners. Start at around 2 o’clock on the oval, drawing counterclockwise, paying attention to apply more pressure on your downstrokes and use less pressure on the upstrokes.
In the word balancing, you can find the oval in the ‘a’ and ‘g’. Also look for partial ovals, such as in the ‘c’.

You may also like: How To Write “Thank You” In Calligraphy
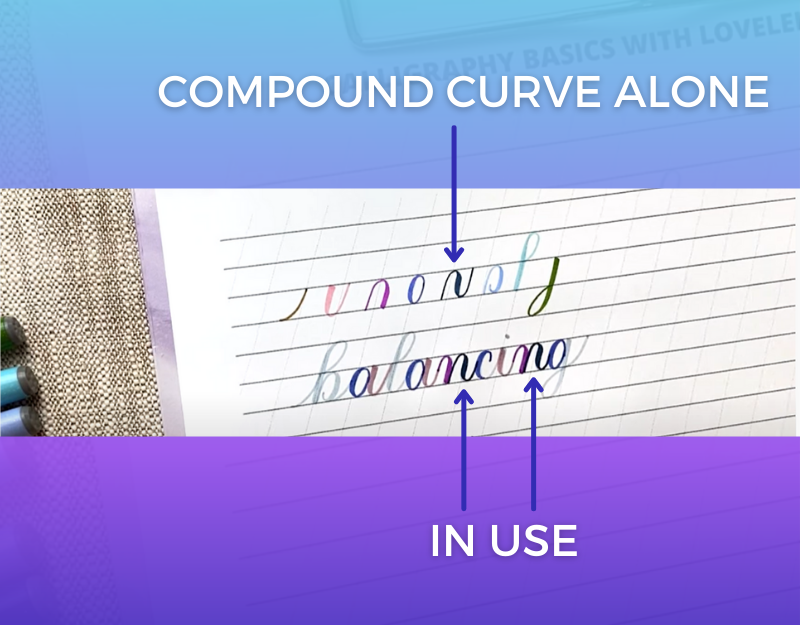
4. Compound Curve
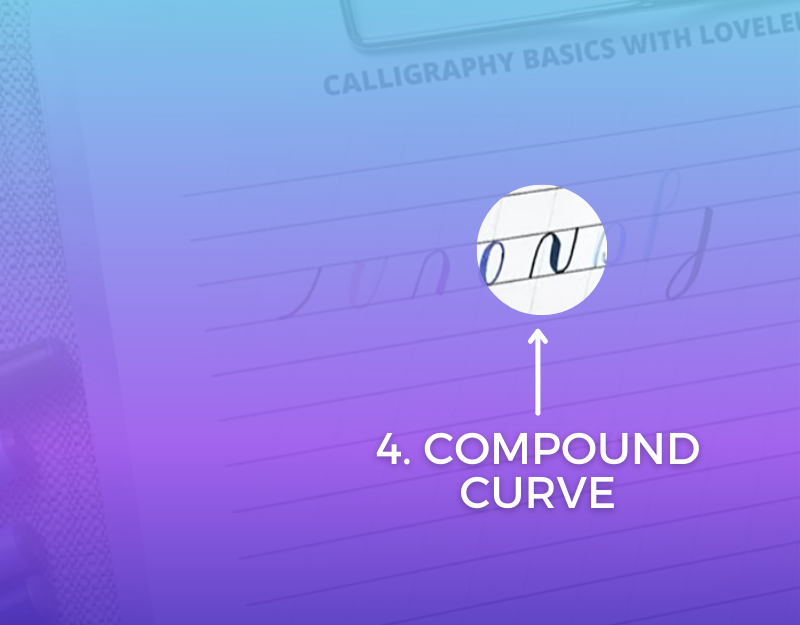
A compound curve is a combination of an overturn leading into an underturn. Starting at the baseline, draw up using light pressure, curve around the top then plunge down to the baseline with more pressure and finish with a light upturn.
In the word balancing, you can find the compound curve at the end of the ‘n’.
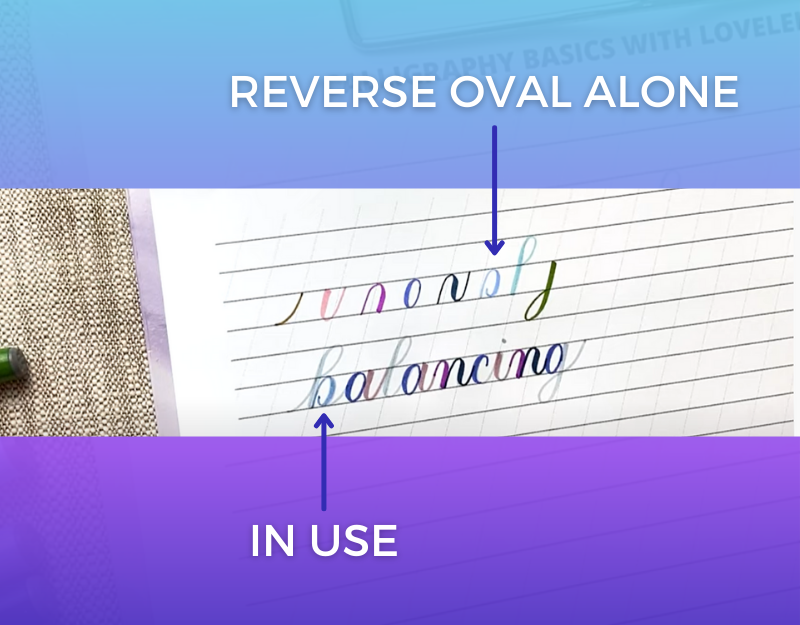
5. Reverse Oval

This basic calligraphy stroke starts with a straight line that goes up, around clockwise, with a thick line going down and slight curve back in at the bottom.
In the word balancing, you can find the reverse oval in the ‘b’.
You may also like: How To Do Bounce Lettering
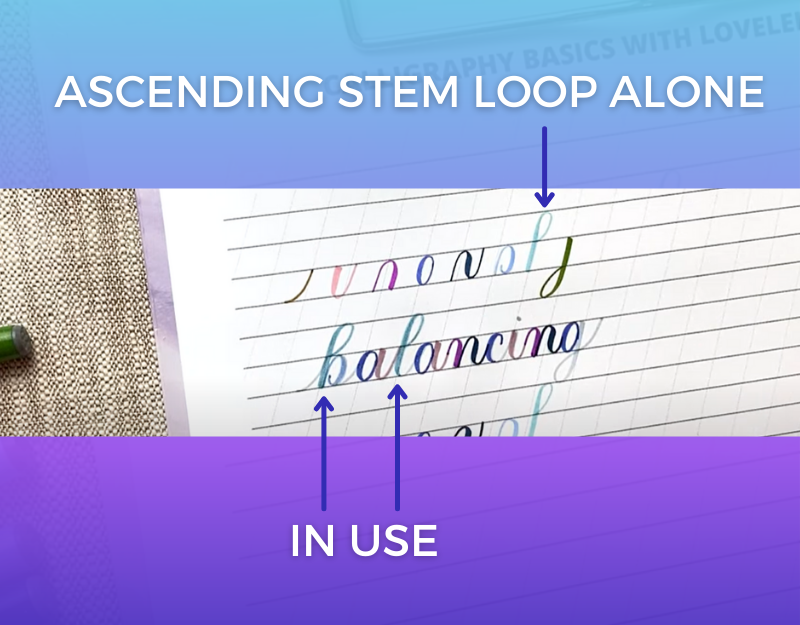
6. Ascending Stem Loop
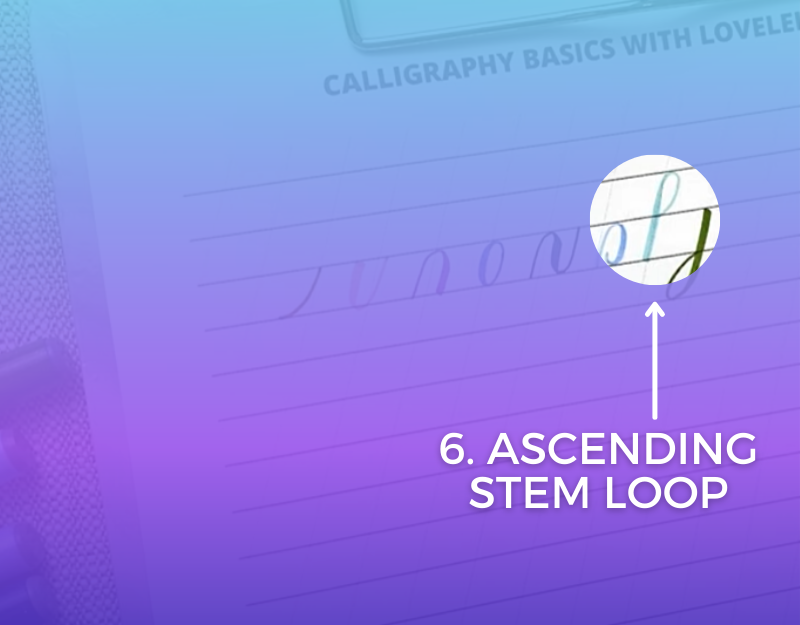
This is also sometimes referred to as just the ascending loop. Start at the header line with a thin curved line up, then turn down with a thick stroke straight down - always parallel to the practice sheet slant lines.
In the word balancing, you can find the ascending loop in the ‘b’ and ‘l’.
7. Descending Loop

The descending loop looks kind of like a lowercase ‘j’. It starts at the header line, goes down below the baseline, curves around and loops back in.
In the word balancing, you can find the descending loop in the ‘g’.

You may also like: How To Use A Pointed Pen
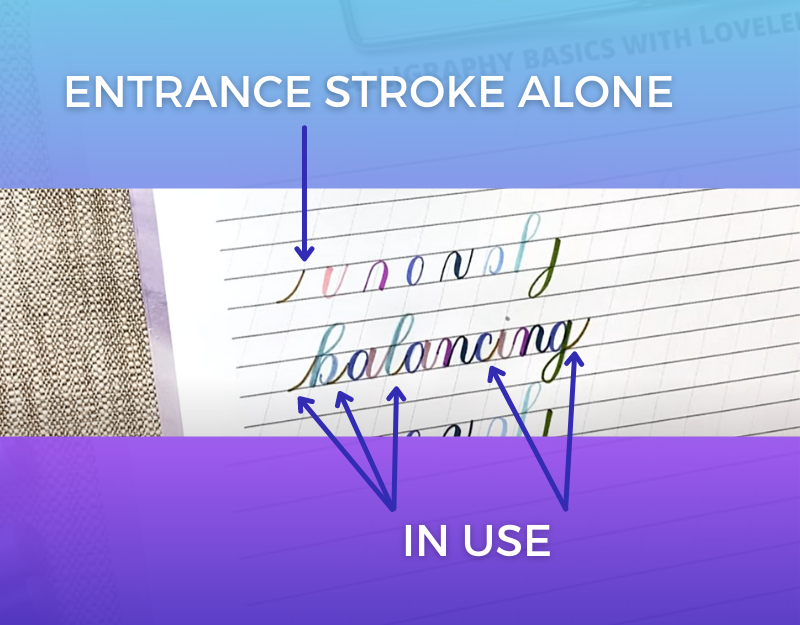
8. Entrance Stroke
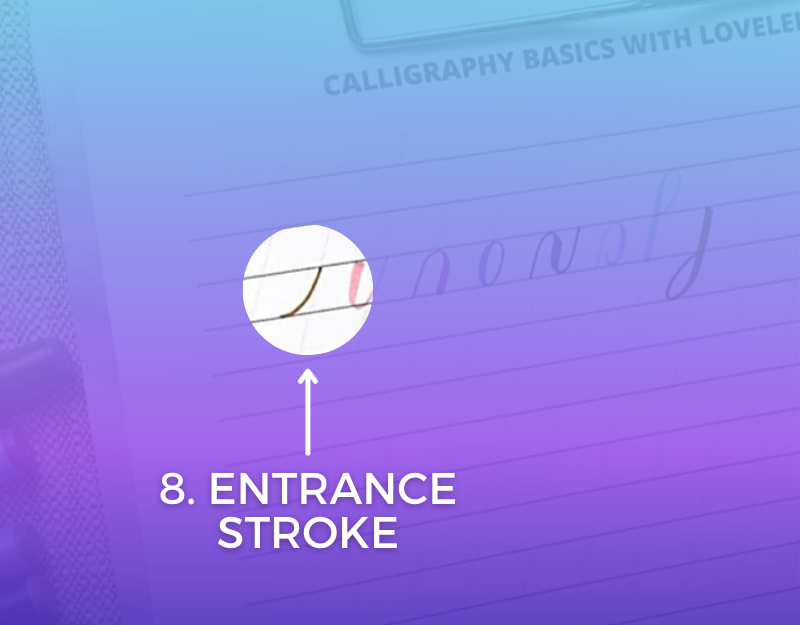
The entrance stroke is a thin, curved line found at the beginning and ends of letters. For this reason, it’s also sometimes referred to as an exit stroke.
It’s also found between letters, connecting them. In the word balancing, you can find the entrance stroke in the ‘b’, ‘a’, ‘c’, and ‘g’.
Unaccounted For Strokes
While these 8 basic calligraphy strokes make up all basic letters, there are a few extra elements that are not accounted for. Examples include the dots of ‘i's, the crossbars of ‘t’s, and the hook in the lowercase ‘r’.
Even though it’s not an absolute list, given these exceptions, these are the fundamental building blocks of the lowercase alphabet.
Using them creates consistency and symmetry. For example, when we create the descending loop in the lowercase ‘j’, ‘g’ and ‘y’, your letters are extremely consistent and perfectly aligned.
On a functional level, the separate strokes also identify where we lift our pen.
At first glance, calligraphy can look like a simple natural evolution, but great care has gone into these strokes over hundreds of years. If you’re anything like us, you’ll be intrigued by the history.

History Of The Basic Calligraphy Strokes
The basic strokes are old conceptually and there are many books dating back hundreds of years that teach them in different ways.
Tools varied over the centuries, from sharpened quills, to steel tips, and now the popular brush pens. As the tools evolved, so did the instruction of these basic calligraphy strokes by teachers throughout the ages.
When we researched the history, we found it interesting that the tools weren’t the only things to evolve; the language itself has developed as well.
In historical texts, calligraphy is not usually the term that is used. The terms penmanship, script, handwriting, roundhand and copperplate are used instead.
Likewise, the names of the 8 basic calligraphy strokes were not always as poetic as “descending loop,” “overturn” and “entrance stroke.” In some instances, the strokes were simply identified numerically (i.e. “Stroke 1, Stroke 2”).
Others classified the strokes using different shapes and names. In 1813, John Jenkins wrote “Art of Writing” (Source: https://archive.org/details/JenkinsArtOfWriting/page/n5/mode/2up), calling The Principal Strokes: “Direct L, Inverted L, Curved L, J, O, and Stem”:
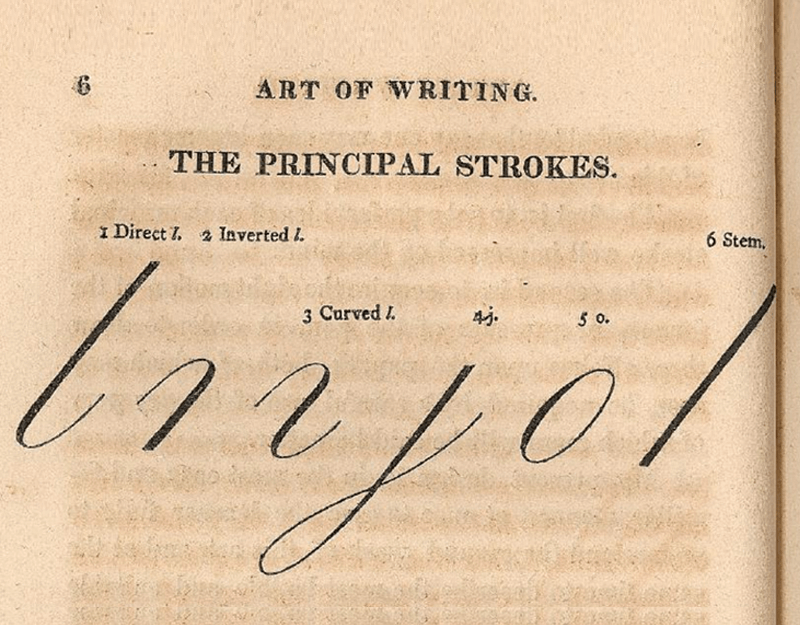
1813, John Jenkins “Art of Writing” https://archive.org/details/JenkinsArtOfWriting/page/n5/mode/2up
You may also like: Modern Versus Traditional Calligraphy
As you may notice from the above example, not all sources name exactly 8 strokes. As writing styles changed and instructors analyzed the scripts in different ways, the number of strokes changed with it.
Not unlike today, calligraphy was taken quite seriously by those who published writing on the subject. One author even offered an opportunity to submit writing to him via the post and have it critiqued!
As calligraphy teachers ourselves, we respect that enthusiasm. But thankfully, we live in an age where it’s much easier to get in touch with fellow calligraphy hobbyists and enthusiasts. You can simply join our Facebook group, no stamps required.
Oftentimes, the history sources used written instructions rather than diagrams to describe how words and letters were formed. We have to admit, we feel pretty lucky to be calligraphy teachers in the modern age when we can show photos and videos to teach!
Basic Calligraphy Strokes Historical References
For anyone who enjoys pouring over documents and literature about calligraphy, here are the direct sources for you to enjoy:
1813 John Jenkins, “Art of Writing”: https://archive.org/details/JenkinsArtOfWriting/page/n5/mode/2up
1821 Eleazer Huntington, “Huntington's Art of Penmanship”: https://babel.hathitrust.org/cgi/pt?id=nyp.33433006223956&view=1up&seq=31
1908 W. A. Baird, “Lessons in Roundhand” from The Business Educator: https://digitalservices.scranton.edu/digital/collection/zanerbloser/id/3670/
1924 E. A. Lupfer, “Zanerian Manual of Alphabets and Engrossing”: https://archive.org/details/Masgrimes_Archive_Zanerian_Manual_1924
1989 Eleanor Winters, “Mastering Copperplate Calligraphy”: https://www.amazon.com/dp/0486409511?ref=exp_loveleighloops_dp_vv_d
2018 Paul Antonio, “Copperplate Script: A Yin & Yang Approach”: https://pascribe-workbooks.myshopify.com/collections/manual-products/products/copperplate-script-a-yin-yang-approach
Last Tips And Next Steps
It’s time to get comfy with the basic strokes! Take this learning process one at a time, and don’t try to blow through strokes 1 through 8 in a row. Start with warm-ups, focusing on thick down strokes and thin up strokes, before moving into specific strokes.
We may sound like a broken record, but don’t be shy to download your basic calligraphy strokes pdf to help you practice. We really believe it will give you a head start over practicing letters and words.
In fact, to quote Jenkins from 1813:
“I have therefore dissected the letters, placing the six principle strokes by themselves, that the learner may draw them accurately, before he proceeds to form letters; as soon as he is able to do this, he will go on to write with great ease—because twenty-five of the small letters, and several of the capitals, are made by the different combinations of these principal strokes, with but a little variation or addition.
It is therefore the interest of the learner to pay his first attention to these strokes, which are exceedingly simple, considered separately, their likeness one to another, and their dependence on each other, as may be plainly seen and easily understood…”
1813 John Jenkins, “Art of Writing”
We couldn’t agree more with that advice :)
If you’ve been asking yourself “what is the best way to learn calligraphy as a beginner?” then we are here for you! Browse all of the articles on our website, or see if a calligraphy course is right for you.
We also have more tutorials waiting for you on our YouTube channel. The basic calligraphy strokes are just the beginning - we’re here to support you on your entire calligraphy journey.
And finally, don’t forget to download the free worksheet!
Enter your email address and we’ll send it right to your inbox: