
How To Write Thank You In Calligraphy
There’s a tangible magic to expressing gratitude. We experience all kinds of psychological benefits of being grateful and taking stock of the goodness around us.
And when people feel genuinely appreciated, they're more likely to continue their positive actions. Handwritten thank-yous contribute to the cosmic cycle of kindness and generosity.
Save for later! ↓
There's no more beautiful way to do this than with calligraphy. Learning how to write thank you in calligraphy is a skill that you will find yourself using every time you sit down to write a thank you card, but learning a new skill can seem like a lot of guesswork.
That’s where we come in.
We’re Jordan (left) and Jillian (right) - your enthusiastic calligraphy teachers. We’ve taught tens of thousands of students calligraphy online, and we’re SO thrilled that you’ve joined us here today at Loveleigh Loops.

We’re the twin sisters behind the thoundands of written guides and video tutorials you’ll find here at Loveleigh Loops
Pull out some paper and a utensil and let’s get going! Today, we’ll look at four different styles of thank you calligraphy. We'll cover both traditional and modern calligraphy styles, plus some fun variations.
If you're new to calligraphy, don't worry! Each of these styles comes with a free traceable worksheet so that no one misses out.
Table of Contents
Thank You Card Supplies
Despite how it might look, you can actually do easy calligraphy with any writing tool you have. The days of quills and jars of ink are long gone!
In order to learn how to write a simple thank you card, you need the following items:
Paper: Make sure to choose the right calligraphy paper for the kind of pen you're using
Guide sheets: Use our traceable guides to follow along
Writing tool: Any pen, brush pen or pencil will do! We used Tombow Fudenosuke Hard Tip in our video tutorial below
Pens at the ready! Let's look at our first style.
Prefer to watch? Here's our video tutorial:
Traditional Calligraphy
Tradtional thank you calligraphy is an classic choice and you can't go wrong if you're looking to add a touch of sophistication to your card.
Popular scripts such as Copperplate or Spencerian create elegant letter forms through a combination of thick and thin lines.
While these scripts start with the fundamental strokes and take time and practice to master, you can download our traceable guide to write this for yourself.

Thank you written in a traditional calligraphy style
Beginner Tips
The letters in this example are inspired by the Copperplate script which is perfect if you want to give your thank you card a vintage look.
As the name suggests, traditional calligraphy comes with a lot of traditions and rules. If you choose to use our traceable guide, you don't have to worry about most of them but keep the following in mind:
Angle: Traditional scripts tend to be more slanted than modern hand lettering (Copperplate has a 55-degree slant)
Thickness: The contrast between thick and thin lines is essential
Consistency: Make sure your letters are consistent in height and slant
Learn more about Copperplate in our beginner’s series:
Modern Calligraphy
Do the rules of traditional scripts make you nervous? Then break free of them and try your hand at modern calligraphy (also called modern lettering).
If you're looking for a more lighthearted style, modern lettering might be the right choice for you. See how effortless thank you looks in a modern script?
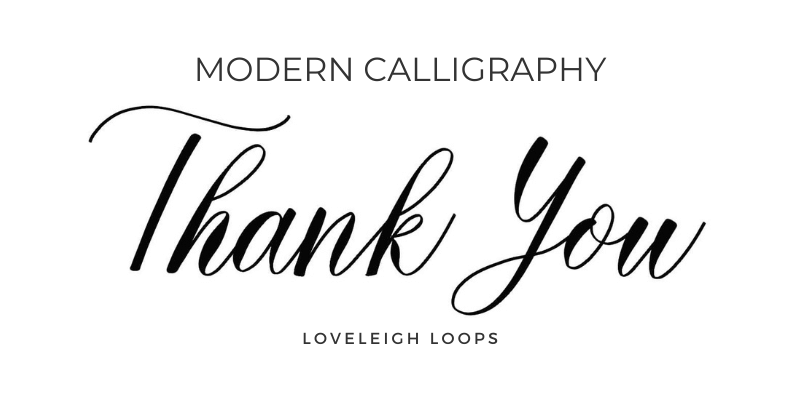
Thank you written in a modern calligraphy style
Beginner Tips
When you look at the modern thank you example above, you can see that modern lettering is very different from traditional scripts. The letters are more familiar and it feels a little less formal.
While rules become more guidelines than requirements, pay attention to the following for the best results:
Letters tend to be open and rounded
Lack of entrance elements provides a more casual feel
Consistency still matters: Letters are of identical size and written at a consistent slant
You may also like: How To Write Happy Birthday In Calligraphy
Bounce Lettering
If you're looking for a particularly fun and playful style, bounce lettering is your ticket.
Remember how you can move away from the basic rules in modern calligraphy? Well, this lettering style takes it to the extreme by getting rid of the idea of a baseline (that’s the bottom line where letters normally rest).
Some letters still rest gently on the baseline, whereas other letters seem to freely move below or above it.

Thank you written in the bounded lettering style
Beginner Tips
At first sight, bounce lettering looks like it's just a matter of moving some letters up and down. However, you'll see that there's a clear right and wrong way to do it when you try it yourself.
If you want to create this effect, here's what to keep in mind:
Only bounce some letters: You need letters that bounce and ones that don't
Wavy lines in the y or t-crossbar give any phrase a free-flowing effect
Open letters: Maintain round, open letterforms
Be warned that bounce lettering looks a lot easier than it really is. Bouncing letters may look playful and spontaneous but there's a lot of planning and theory behind its renegade good looks.
For a deep dive into this fun lettering style, check out our in-depth guide to bounce lettering.
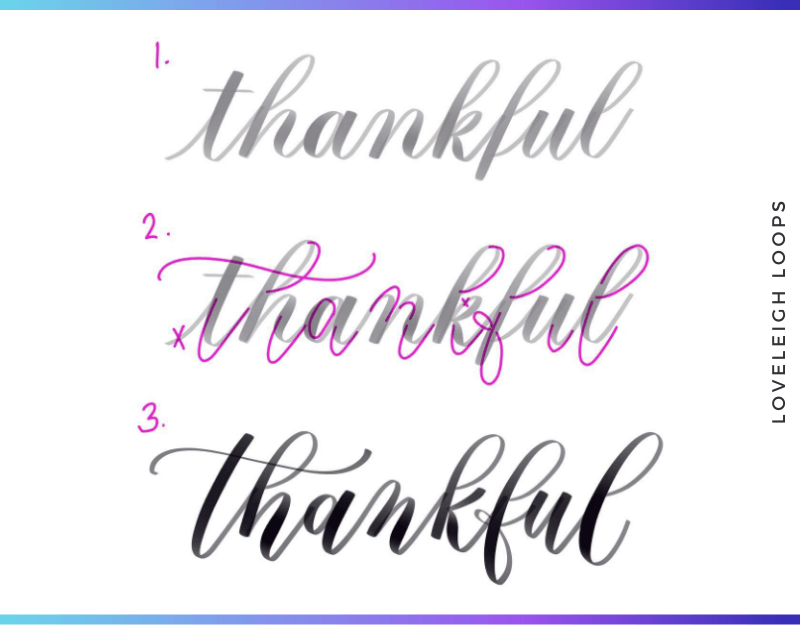
How to bounce letters using the word "thankful" as an example
Flourished Calligraphy
Our last example contains calligraphy with a lot of swirls and embellishments. These decorative lines, called flourishes, give your words an almost dreamy, ethereal quality.
You can add flourishes to any modern or traditional calligraphy style and it's a great way to give your work your unique touch.
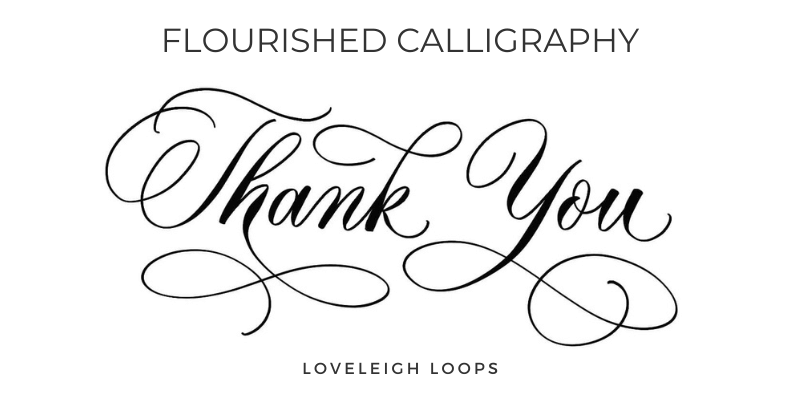
Thank you written with flourishes
Beginner Tips
At first sight, flourishes look effortless. They’re meant to look this way, but just like bounce lettering, there’s a lot of theory behind doing it well!
Here are a few pointers to help you design your own thank-you card:
Bigger is better: Small flourishes tend to make your words hard to read
Less is often more: A few large flourishes are better than many smaller ones
Try to cross lines at a straight angle
For fun, just try your hand at flourishing any of the other styles on the traceable worksheet and you'll see why it took us years to feel confident with it!
Want to learn this for yourself? Then come join us in The Flourish Space where you can find lessons as well as an online community of fellow calligraphy students.
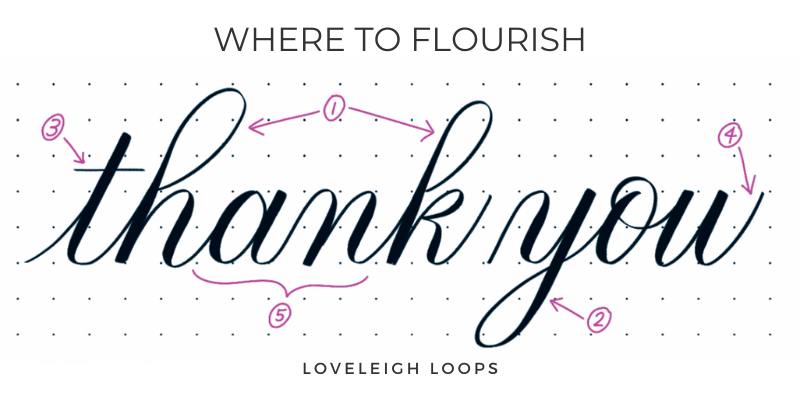
Where to flourish the phrase "thank you"
Bonus: Gratitude
Want some more inspiration? Here's the word gratitude written with a mix of both traditional scripts and hand lettering styles.
Notice the differences between the basic, bounced, expanded, formal, capital and flourished styles? While all calligraphy starts with structure and repetition, you use the basics as building blocks for unique lettering choices.
These are all examples of digital calligraphy:
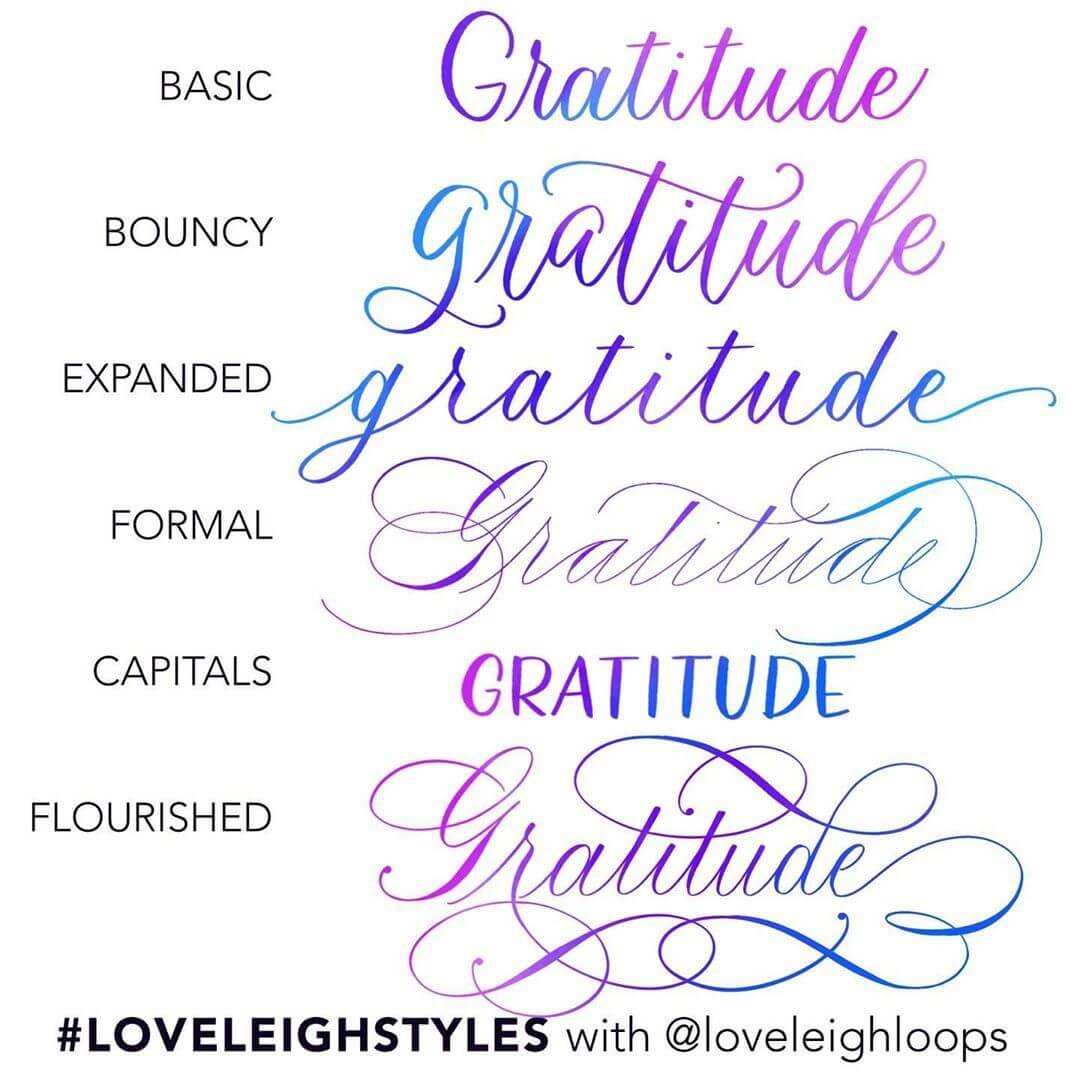
Gratitude written in 6 different lettering styles
Making Matching Envelopes
If you want to make your thank you cards even more personalized, make matching envelopes!
We have a video tutorial that teaches you how to make the exact design below. To create your own unique design, let these tips help:
Plan out your design with a pencil so that you can tweak and refine your composition without burning through sheets of paper
Consider mixing lettering styles. On the image below, you see bounce lettering combined with all-caps sans-serif
Reflect similar design elements on both the card and the envelope to help the design feel cohesive
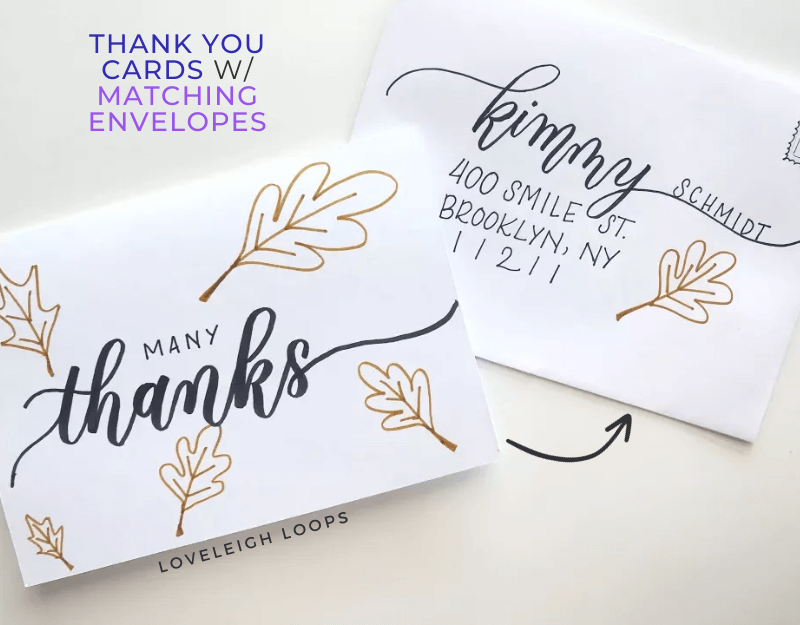
Thank you cards with matching hand lettering envelopes
Final Thoughts
No thank-you is quite as personalized as a handwritten card.
This is your sign to stop looking at vectors of handwriting wishing that you could write like that yourself, and start learning with us! With some practice (or our traceable worksheets), you can make your own beautiful thank-you cards.
We’re here to support you every step of the way! We’d love for you to join our Facebook group and introduce yourself so that we can get to know you and see how we can help further.
More calligraphy tutorials:
